Cut your Hairs yourself - SuckN'CutY


Print Profile(1)

Description
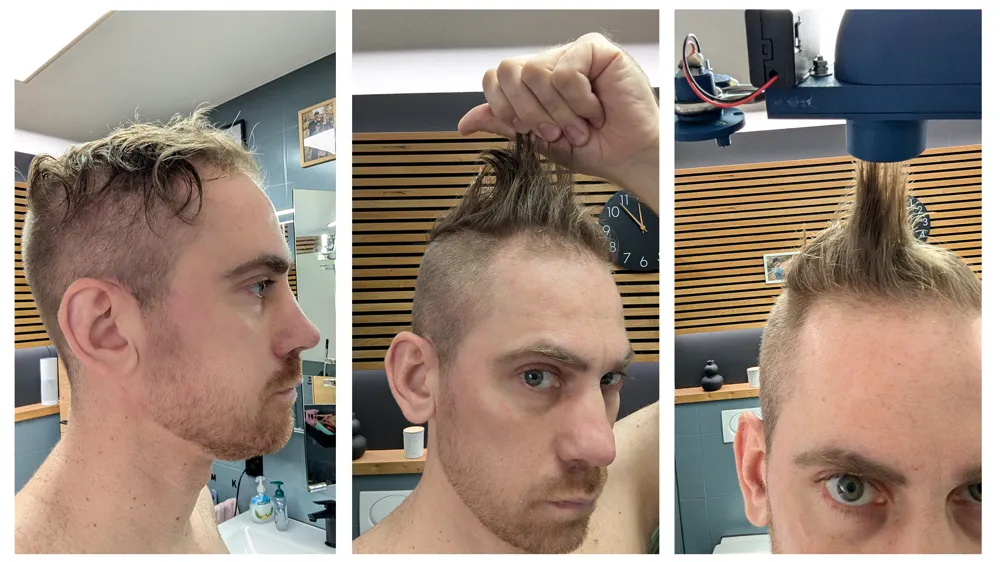
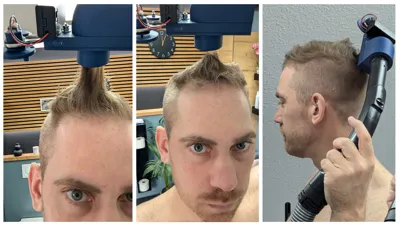
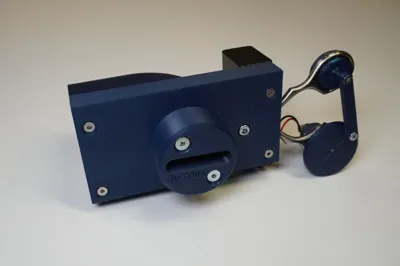
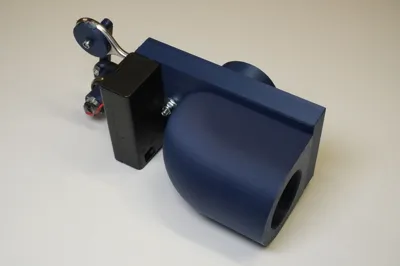
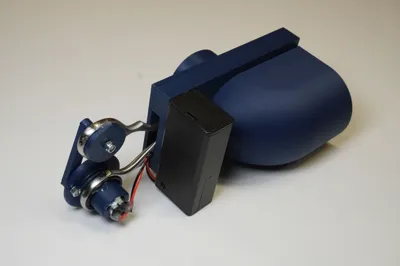
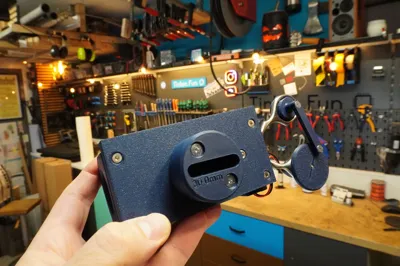
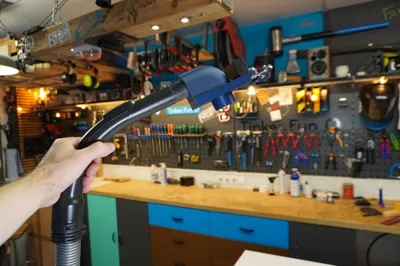
Do it yourself Hair Cutter
- Connects to the vacuum cleaner
- Cutting your hair yourself to the preferred length
- No separate power line
- Works with 9V battery
- Simple components
- With part list and exploded view for easy reproduction
Changes V1.2 26.01.2025
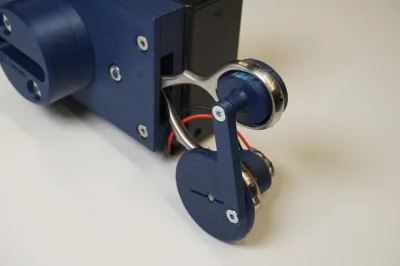
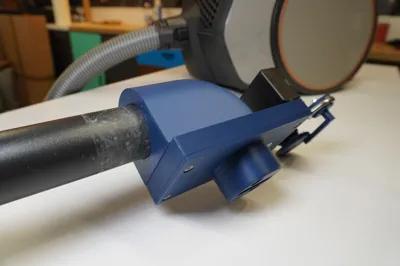
- The hair length adapters can now be changed quickly using a magnetic holder.
- There is a new motor mount so that the motor shaft no longer needs to be shortened.
- A new motor has been added to the parts list. Same dimensions but more power for the battery voltage


Filament
I printed my machine with Bambu Lab PLA Matt. That worked perfectly. PETG is certainly also suitable.
Boost Me (for free)
Thank's for your support!
I would be very happy about your support: PayPal me
Tinker.Fun on YouTube: https://www.youtube.com/tinkerfun
Tinker.Fun on Instagram: https://www.instagram.com/tinker.fun
Public project file in STEP and Fusion 360 for your own modifications

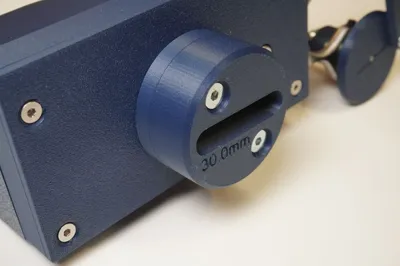
The length of the hair length adapter can be freely selected in Fusion 360 using just one parameter.
Following Adapter are here for download: 30mm, 40mm, 50mm & 60mm.

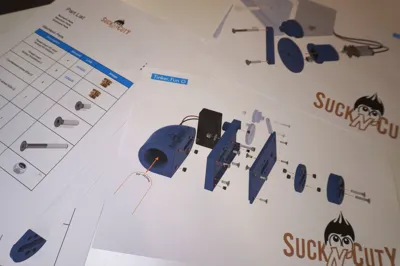
Attached Part List & Part Overview files
In the attachment you will find a parts list and an overview of how the assembly must be carried out.
*Advertising*
The following articles are also helpful:

Tests/Experience
So far only tested on myself with a short hairstyle (30mm & 40mm). But I've been cutting my hair with the machine for 6 months now.
I use the SuckN'CutY hair cutter together with a short hair cutter. The bottom part with the short hair cutter e.g. 3 & 6mm and the top with the SuckN'CutY.


Instruction
Please watch the YouTube video for assembly instructions. Special attention is paid to the installation of the scissors and the motor.
V1.2 changes are not in this video.
Perhaps not the best machine, but it works and is fun to build :-). Maybe you have ideas for optimisation #Community
Boost Me (for free)
I am very happy about your support, thank you!
Feel free to take a look at my other makerworld models
Tinker.Fun 3D Models

Examples from my models:
 |  |  |
 |  |  |
I would be very happy about your support: PayPal me
Tinker.Fun YouTube: https://www.youtube.com/tinkerfun
Tinker.Fun Instagram: https://www.instagram.com/tinker.fun
Comment & Rating (9)