


Print Profile(4)


Description
Click the link to view more of my intriguing designs
Boost Me (for free)
Click to boost my shared model; your support fuels my continued creativity.
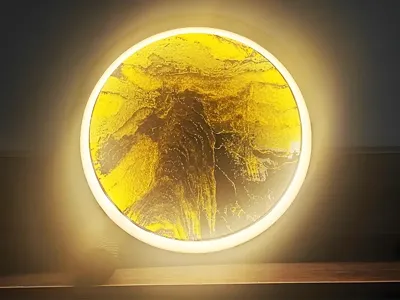
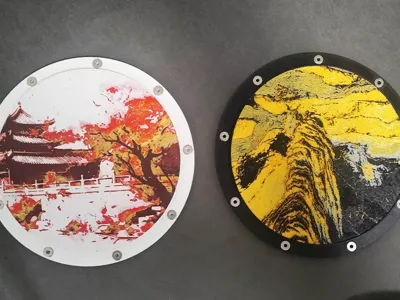
Magnetic Embossed Picture Ring Light—freestanding or wall-mounted—currently offering two color embossed pictures, in black and white within the model files; further artwork will be added continuously.
November 7, 2024: An additional embossed picture added
I have also listed the finished lamps on Bilibili Workshop. Those wishing to purchase finished products can click the link below.
Magnetic Embossed Picture Ring Light Bilibili Workshop Purchase Link

Accessories Requiring Separate Purchase
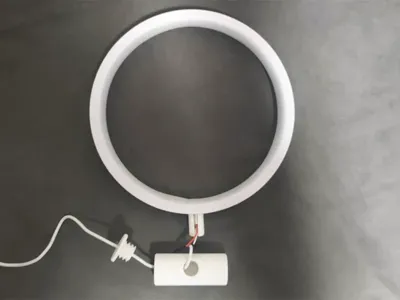
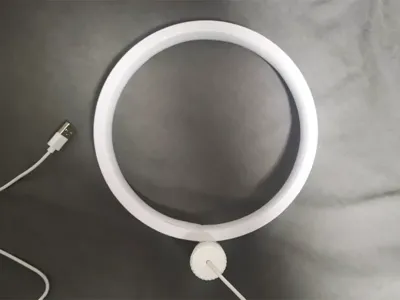
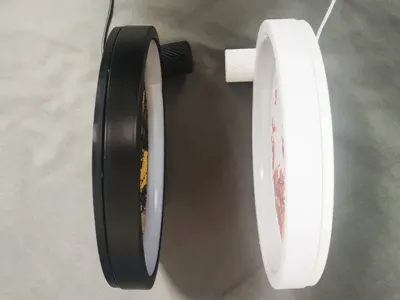
① 20cm outer diameter ring light. Purchase the style shown below; white or black options available. Embossed pictures are available in black and white; refer to the effect diagram.

② Nine 10mm diameter × 3mm thickness × M3 countersunk neodymium magnets (N52 grade preferred)
③ Nine M2.5 × 5mm countersunk screws
④ 30mm circular transparent double-sided adhesive (unnecessary if not using the wall-mounted mode)
Slicing and color matching video tutorial address
The following animation demonstrates the slicing method for the embossed pictures in the downloaded files. The slicing process is lengthy (if the animation does not display, a video tutorial is included in the downloaded files)
Operating procedure: Directly drag the 3MF file into Bambu Studio. Do not adjust any settings or move the model. Simply click "Slice Current Plate."

The following animation demonstrates the color matching method for the embossed pictures in the downloaded files (if the animation does not display, a video tutorial is included in the downloaded files)
Operating procedure: You can adjust the AMS filament slots according to the order in the instruction document, or modify the filament colors according to the layer number in the instruction document as shown in the animation below. After modifying the colors, you need to slice again; the slicing process is lengthy.

Assembly details below. For assistance, leave a message or join the QQ group 881019125
Ring light disassembly diagram. Minor variations may exist between batches, but they are largely similar.
Strictly follow the order of disassembly and assembly. Parts marked for removal are to be discarded.
When cutting the cables, ensure sufficient wiring length is retained. Generally, 2-3 cm of wire extending from the metal ring is optimal. Distinguish between positive and negative poles.


Post-Wiring Photograph (for reference only)

Wiring Diagram (for reference only)

Note: For the wall-mounted mode, the open-ended nut does not need to be installed, as shown in the diagram below.

Note: The neodymium magnet specifications shown in the diagram are incorrect. The actual dimensions are 10mm diameter × 3mm thickness × M3 countersunk, but there is a margin of error; the actual thickness is approximately 2.6 mm.

Note: If only using the freestanding mode, the double-sided adhesive and wall-mounting nails shown in the diagram below do not need to be installed.

Documentation (5)
License
You shall not share, sub-license, sell, rent, host, transfer, or distribute in any way the digital or 3D printed versions of this object, nor any other derivative work of this object in its digital or physical format (including - but not limited to - remixes of this object, and hosting on other digital platforms). The objects may not be used without permission in any way whatsoever in which you charge money, or collect fees.
Comment & Rating (0)