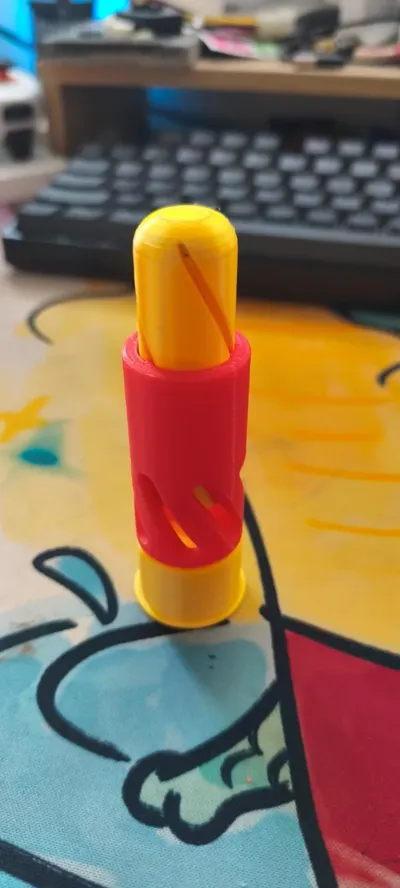
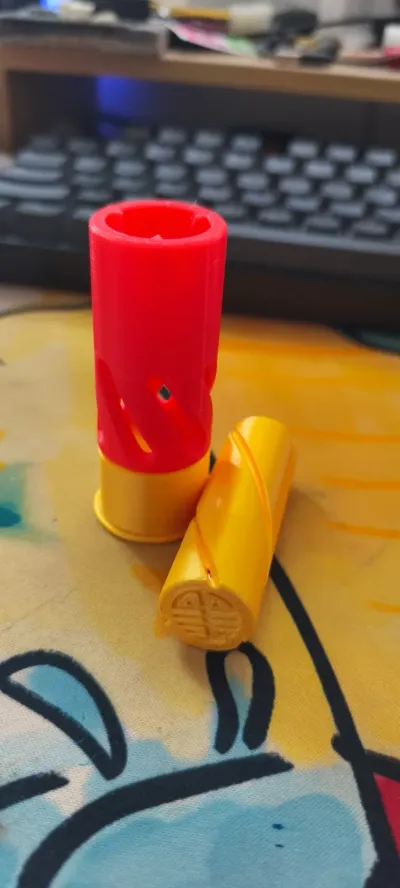
Shotgun Magnetic Button


Print Profile(1)

Description
Boost Me (for free)
Thank you for your support!
The shotgun magnetic button is a stress-relief toy, inspired by shotgun shells.
The design has a manual pause, you need to manually place the magnets. Be careful not to place them wrong. Before placing, make sure the poles are correct and make a note of it!
I first made sure the poles were correct, marked all the upward faces with a marker, and placed the magnets separately, making it easy to take and place when printing was paused.
Long story short, here are some pictures!
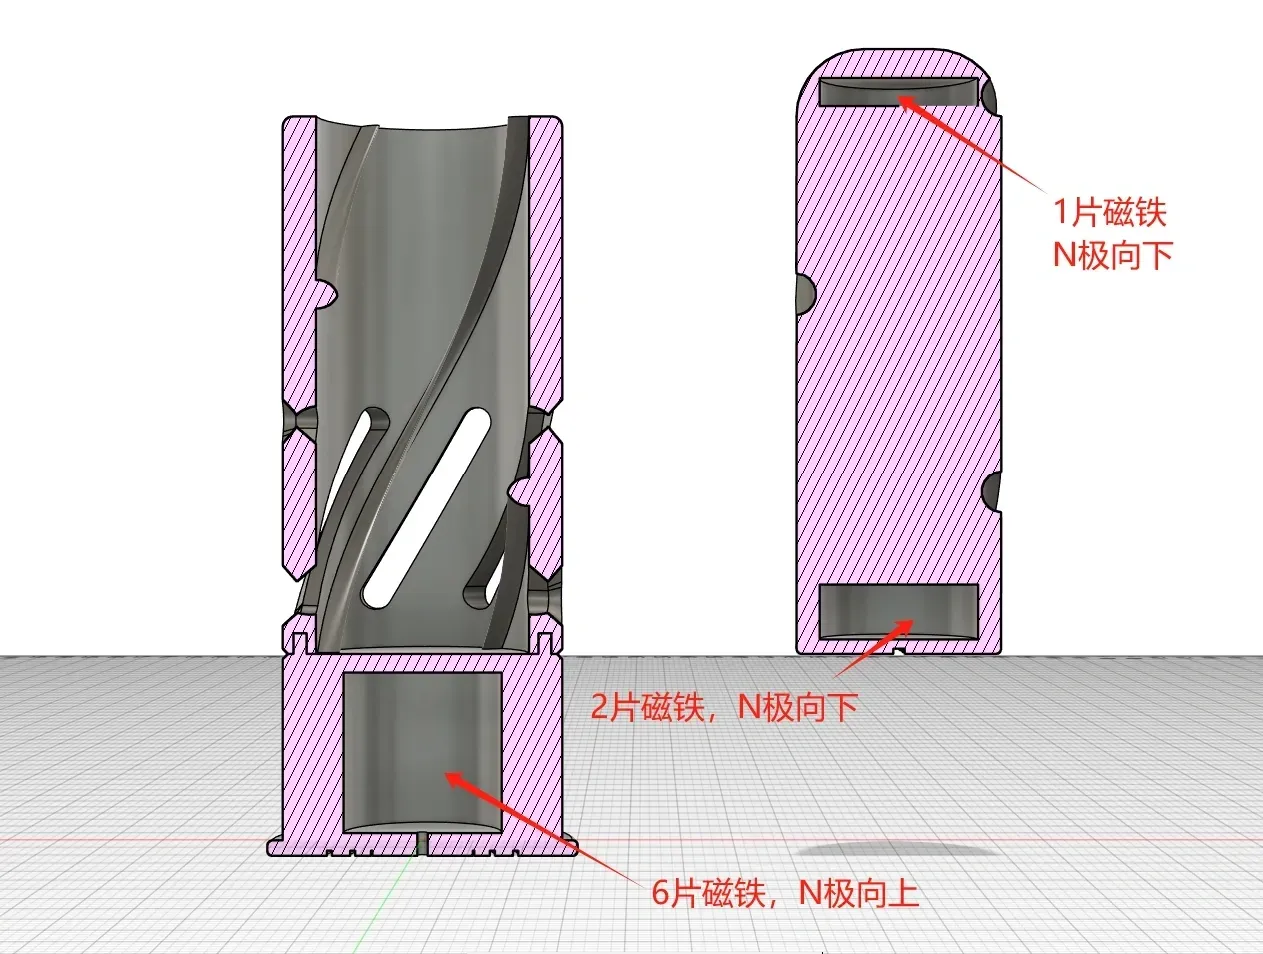
There are 9 neodymium magnets in total, single piece size: 15mm diameter * 2.5mm thickness, round.
Shell bottom the position of the 6 magnets does not actually need to be divided into NS poles, as long as the Bottom of the projectile The 2 magnets on the bottom are repelled from the same poles, and Top of the projectile is consistent with Bottom of the projectile Direction of the poles.
I have left 0.2cm clearance for each assembly and the reserved space. Eat it with confidence.
Note: Two of the three magnet reserved spaces are close to the heating bed. Because there is magnetism, they will not be sucked away by the nozzle, while Top of the projectile The magnet of the will be sucked away. Before placing the magnet, please drip a few drops of glue. After solidifying for half a minute, you can continue printing!
According to my magnet placement method, the round head facing up is a spring button, the flat head facing up can become a seal. If you want both ends to be spring buttons, please place the top magnet in the opposite direction as planned and make a note.
Comment & Rating (0)