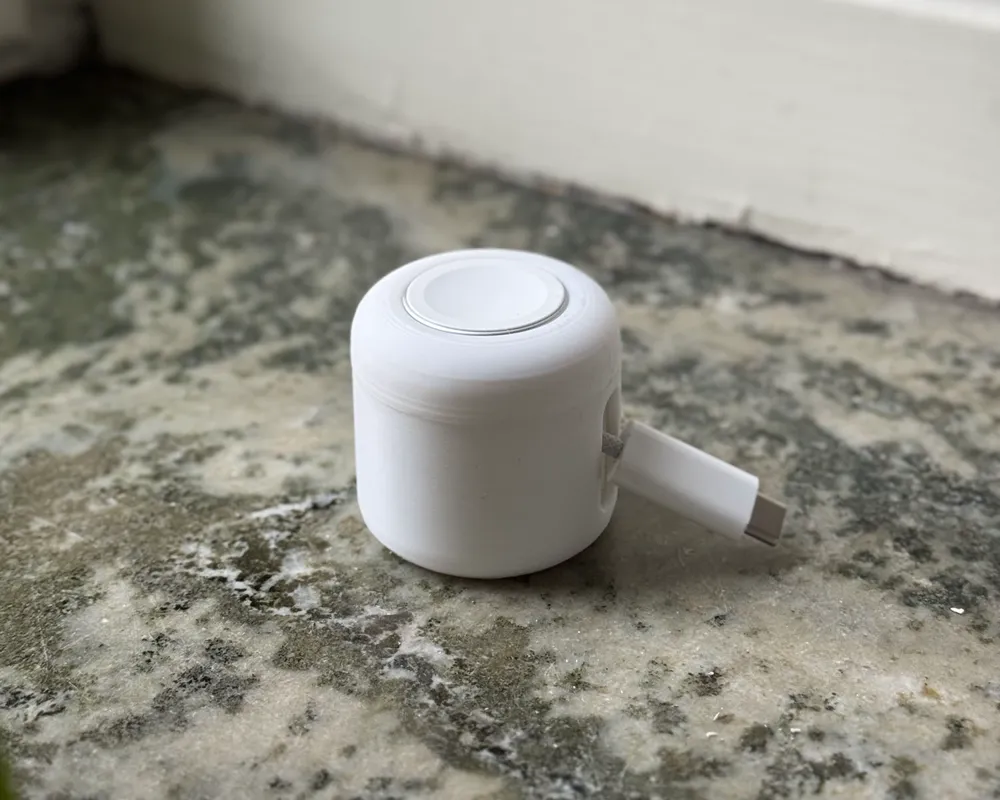
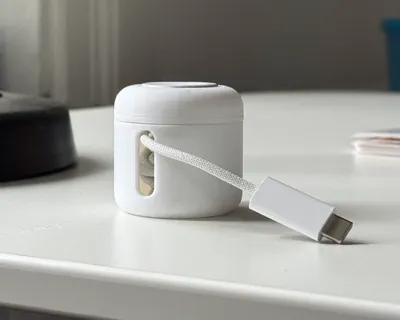
Apple Watch wind up travel charger holder


Print Profile(5)


Description
Updated version!
There is now a more compact version with smoother winding action.
—
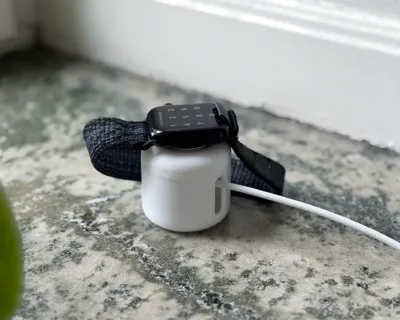
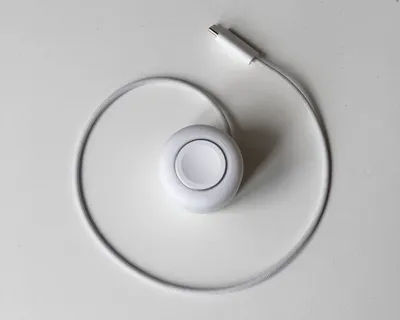
Needed an easy way to carry an extra apple watch charger in my bag, without tangling the cable. This design holds the puck securely and allows you to wind up the cable inside by spinning the top.
PLEASE NOTE
There is a USB-C version and a USB-A version of the top piece. I have not tested the USB-A version since I don't own that specific charger, so if you do and try it, please report back!
Also, the winding / unwinding action is a lot smoother using the newer braided cable version of the charger. With the old rubber style cable, it gets stuck more, but that might be somewhat alleviated by the rod thickener attachment.
Update 1:The USB-A version is now correct dimensions (tested) thanks to getting the measurements from @user_594534412.
Update 2: Some have suggested that the retracting and extending the cable would be easier with a thicker rod. I've added a “rod thickener” to the print files which can be attached to a previously printed rod to make it 15mm in diameter instead of 8mm. It's a snug fit but if you have trouble sliding it over the original rod, just file it slightly or scrape the corners with a knife. '
Printing instructions
Prints without supports, but a brim is recommended.
Assembly
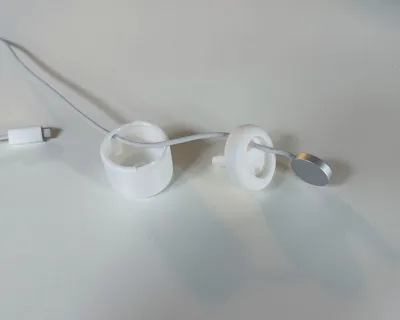
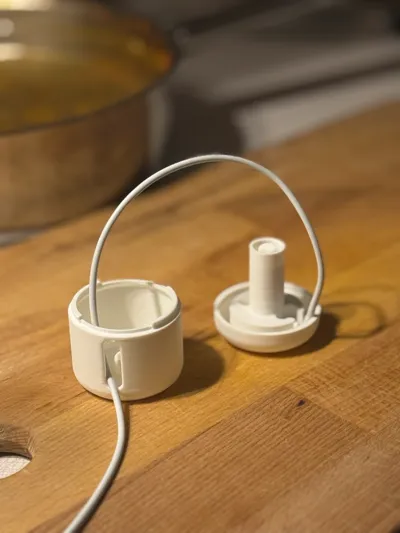
- Feed the plug through the top,
- Now feed the plug through the opening in the bottom piece (from the inside going out)
- Fit the small rod into the underside of the top piece
- Snap the top piece to the bottom piece
If you need to disassemble the pieces again, squeezing the bottom piece on either side of the opening makes this easier.
How to use
To wind up:
Hold the bottom piece and twist the top.
To unwind:
Hold the bottom piece and pull the cable.
Versions
There are two versions of the bottom piece.
- No bearing - Completely 3D printed, light and functions well.
- With bearing - Using a skateboard bearing in the bottom (22mm). This makes the rotation a bit smoother, and adds some weight to the bottom which helps to keep it in place. Of course adds a little bit of extra weight. The bearing should be a press fit.
Tolerances
Tolerances are quite tight in some places (0.15mm). Let me know if you struggle and I can upload one that's more forgiving.
Boost Me (for free)
License
You shall not share, sub-license, sell, rent, host, transfer, or distribute in any way the digital or 3D printed versions of this object, nor any other derivative work of this object in its digital or physical format (including - but not limited to - remixes of this object, and hosting on other digital platforms). The objects may not be used without permission in any way whatsoever in which you charge money, or collect fees.
Comment & Rating (511)