


Print Profile(2)


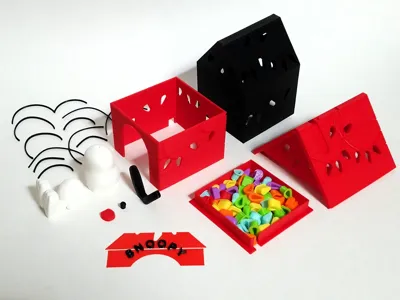
Bill of Materials


Description
~~~Update~~~
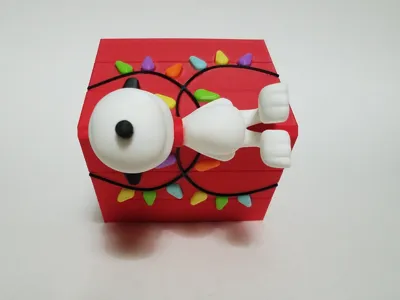
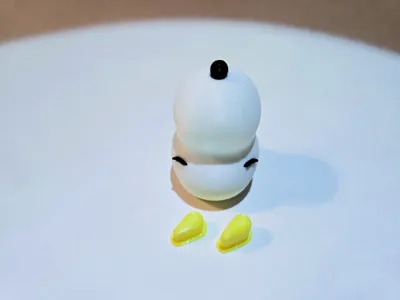
I finally added eyes! This will require re printing the head and of course the eyes themselves (and another nose). They should be tight enough but may require a drop of glue.
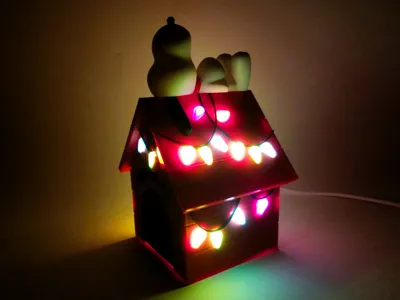
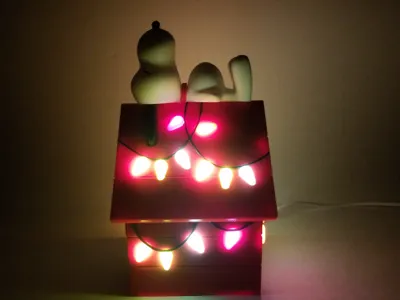
I also updated the lights. As some folks have pointed out, there was a minor issue with the lights. I had that on a handful of my lights too but wrote it off as just using old filament. Turns out the original file had a radius leading up to the bottom of the top surface which caused some little gaps and blemishes in that top surface which looked kinda like under extrusion. I added a flat surface that easily bridges the walls which yields a much cleaner result.
~~~
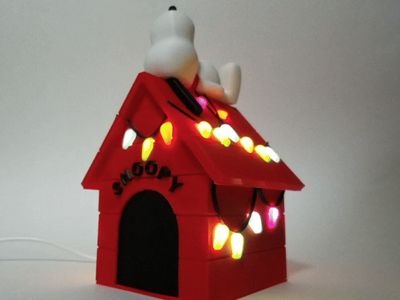
The Charles Schultz Christmas time classic of Snoopy sleeping on his festively lit doghouse. I designed this without the need of the AMS/other color swapping systems, so everything is it's own unique part. Sure the AMS will help for multi-object plates, but you won't need one to create this.
Assembly
- Put the roof and main house over top the inner black part. This keeps them together and prevents any of the light from shining through the red. It will be a tight fit.
- Glue time- carefully glue on the cables, some are very similar or even symmetrically opposite, but the side that was on the print plate should be the side with the glue. If you'd rather not glue these, feel free to use a fine/ultra fine tip sharpie to color in the grooves. Also glue on the SNOOPY part, alignment should be pretty straightforward, but make sure to use a clear drying glue. I designed it like this so you wouldn't have to do each letter individually or line them up through the back like the lights.
- Now the lights. There are taller lights for the angled roof faces, and shorter lights for the vertical walls. The profile will print a couple extra of each color, but I found this size should be a snug/very snug fit for nearly every hole. If one doesn't work, try another, I only found one that wasn't a snug fit. If they're all not fitting, you don't have the red house parts aligned adequately enough with the inner black part. I will say however, getting some of these lights in place is a bit cumbersome, especially if you have fat fingers like me.
- On to Snoopy - Start by slotting the ears on the roof. Then put the two little pegs in the head/body, and press those into the respective holes on the roof. Next slide the collar down in it's spot, should fit snug, and finish off by carefully drawing on his sleepy eyes.
- Now you can snap on the base, but only after you slip a light kit led, some led strip or even fairy lights in to light it up!
The plates for both profiles should be pretty self explanatory. You may get some ugly overhangs in spots, but they'll be hidden away on the inside, so no need to waste support. Feel free to change the light colors. If you want to move the cable cutout, there's a negative cube on the three parts you'll need to move, it helps to center them all onto the same plate to ensure alignment.
License
You shall not share, sub-license, sell, rent, host, transfer, or distribute in any way the digital or 3D printed versions of this object, nor any other derivative work of this object in its digital or physical format (including - but not limited to - remixes of this object, and hosting on other digital platforms). The objects may not be used without permission in any way whatsoever in which you charge money, or collect fees.
Comment & Rating (163)