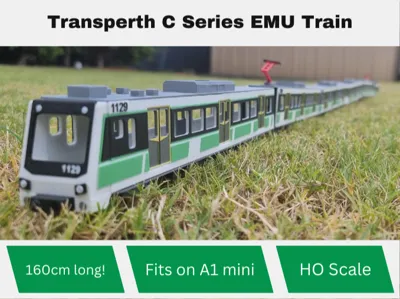
Transperth C Series EMU train - HO Scale


Print Profile(2)


Bill of Materials


Description
This is a fully 3D printable model of the Transperth C Series train, in HO scale - minus any logos.
Note: This is intended to be a static display piece, and it does not come with parts to connect the cars to each other. If you want to make a powered model, you will have to think of a way to connect the cars together yourself - could be as easy as a simple 3d printed hinge

How to print:
- - All the plates are labelled with how many times you need to print each plate.
E.g. "1x Decals" means print that plate once,
"2x Sides" means print that plate twice.
This model is designed for easy printing, and is therefore not a perfect replica.
- AMS is recommended, but not necessary. All colour changes happen at set layers.
- Glue is required for assembly -> See the assembly guide.
A 0.4mm nozzle will do for everything, but I recommend using a 0.2mm nozzle for the set numbers for extra detail.
This model took a long time in the making. - I hope you like it
Boost Me (for free)
Please boost me so I can keep creating awesome models like this one!
Update: You can now also print some overhead powerlines for your train!:
https://makerworld.com/en/models/808458#profileId-749311
Assembly Guide (pay attention to the images)
1. Assemble the roof and floor pieces. The parts should connect together easily with no glue. The parts for the floor are the one with the holes on the large flat side (for the bogies).
2. Glue the decals to the sides of the cars (note that every car is slightly different! Pay attention to the provided images)
- Start with the thin green strips. They slot in above and below the windows

- For the main decals, the best way to do it is to make a "mirror image" as seen below to avoid confusion

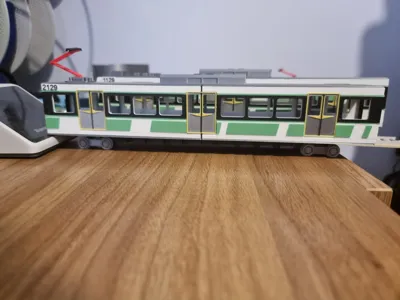
This is how the liveries go onto the cars. (Shown as complete cars so you can get an idea of what the cars look like)
DM cars (top): 1129 and 6129
T cars (middle): 2129 and 5129
M cars (bottom) 3129 and 4129

*The DM car decals have a part that extend past the car walls (below)

2a. (DM car only): Attach the window, lights, and coupler to the cab (but do not glue it to the rest of the car yet!)

3. Glue the vestibules at the ends of the floor piece.
- All floor pieces are exactly the same, but note that DM cars only have 1 vestibule

4. Attach the doors to the sides - you shouldn't need any glue.

5. Glue the sides to the floor and vestibule
5a. Glue the cab to the end of the DM cars. They should slot in nicely. (If they dont, use a pair of pliers to trim a bit of the decal off)

6. Glue roof/floor equipment to their respective places (refer to above image)
- DM cars (1129 and 6129): Aircon, electrical equipment (under floor), coupler (front)
- T cars (2129 and 5129): Aircon, electrical equipment, pantograph
- Pantograph placement goes on the side next to the DM car
- Pantograph orientation
- 2129: <
5129: >
- 2129: <
6a. Glue the set numbers to the cars. Refer to above image for the locations.
- 4129, 5129, 6129 go on the opposite sides
7. Attach cars to bogies. You can glue them on if you want to.
License
You shall not share, sub-license, sell, rent, host, transfer, or distribute in any way the digital or 3D printed versions of this object, nor any other derivative work of this object in its digital or physical format (including - but not limited to - remixes of this object, and hosting on other digital platforms). The objects may not be used without permission in any way whatsoever in which you charge money, or collect fees.
Comment & Rating (29)