Search models, users, collections, and posts
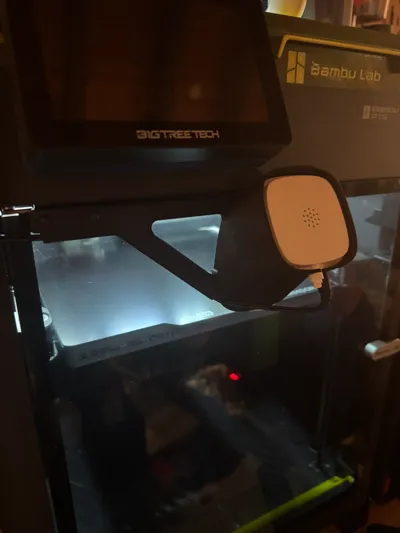
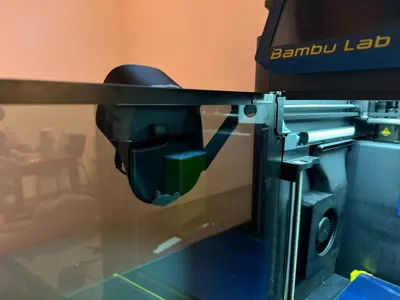
P1S/X1C Tapo C110 Camera Mount
IP Report


Print Profile(3)

0.2mm layer, 3 walls, 12% infill, pre-supported
Designer
1.6 h
1 plate

0.2mm layer, 3 walls, 12% infill
1.3 h
1 plate

0.2mm layer, 3 walls, 12% infill
1.5 h
1 plate
Open in Bambu Studio
Boost
550
1794
333
152
1.9 k
1.4 k
Released
Description
A camera mount for Tapo C110 or C100 cameras.
This mounts the camera the camera to the center front of the door. When the door is closed, you get an unobstructed view of the build plate that extends to almost the entire build volume.
The C110 camera also offers significantly better frame rates than the built in camera on the P1S.
Print Settings
- ABS/ASA Recommended.
- PETG may work, but may flex without additional adhesive holding it to the door.
- Use PLA at your own risk as a warm chamber may cause it to creep.
- Black filament is recommended to prevent reflections from showing up in the camera feed.
Supports are not needed, but are recommended to support top of lip. Default print profile has supports painted on.

Required Parts
- 2 x M3x8mm Screws
- (optional) Blue Tack (can reduce vibrations against door)
- (optional) Tape
Assembly
- Disassemble the Tapo C110 camera by removing the camera from the included mount.
- The ball joint can also be removed by removing the rubber stopper on the bottom and unscrewing it.
- Pre-route the cable by inserting the camera into the mount and plugging in the cable. Some tape can be used to assist with keeping the cable within the groove.
If using blue tack, apply thin strip to top and bottom of the mount

- Unscrew the door by removing the two screws on the top of the door holding it to the hinge.
- MAKE SURE TO SUPPORT THE DOOR WITH YOUR OTHER HAND WHILE IT IS UNSCREWED
- Screw the mount on using the M3x8mm screws.
License
This user content is licensed under a
Creative Commons Attribution-Noncommercial
Comment & Rating (333)