Adaptive Meshing and Priming (KAMP) G-Code


Print Profile(0)
Description
Notice: P1S Firmware Version 1.0.7 breaks adaptive meshing. Do not upgrade if you want this feature.
Its possible that older X1C firmware versions also allow this feature to work, but I do not have one to test with.
Warning: Do not blindly copy g-code that you do not understand.
I take no responsibility for any damage done to your machines. Make sure you understand what the modified G-Code does before implementing it. The changes have been verified to work on the P1S. Adaptive purging currently works on the X1C, but Adaptive Meshing has been reported to not work. Including the code does not seem to cause any negative effects, but also does not provide any benefits.
This modified G-Code is intended to implement KAMP onto Bambu Lab's printers.
What is KAMP?
KAMP or Klipper Adaptive Meshing and Purging is a feature on Klipper printers with two features:
- Generating a bed mesh in only the area that the print occupies.
- Creating a purge line that sits next to the print
This has two big benefits. Generating a bed mesh in only the area that the print occupies means less time spend leveling. Creating a purge line that sits next to the print means less wear and tear on a single area of the build plate. Both can be accomplished via changes to the start g-code of the printer.
Installation
As you may have noticed, the model is a benchy. However, the .3mf profile contains a machine with the modified start g-code based off the default P1S 0.4mm nozzle machine. An easy way to install this would be to open the project and save the profile to a name of your choosing.
Optionally, if you already have changes to your own g-code, you wish to only implement certain changes, or you want to vet the changes (which you absolutely should), the changes are outlined below.
Adaptive Bed Mesh G-Code (Credit: leckiestein on tiktok) | P1 ONLY
Adaptive Bed Mesh is implemented by fixing a line of g-code that generates the bed mesh. Specifically, “G29 A” shoudl be “G29 A1” like on the A1 printers.
IS
;===== bed leveling ==================================
M1002 judge_flag g29_before_print_flag
M622 J1M1002 gcode_claim_action : 1
G29 A X{first_layer_print_min[0]} Y{first_layer_print_min[1]} I{first_layer_print_size[0]} J{first_layer_print_size[1]}
M400
M500 ; save cali dataM623
;===== bed leveling end ================================
SHOULD BE
;===== bed leveling ==================================
M1002 judge_flag g29_before_print_flag
M622 J1M1002 gcode_claim_action : 1
G29 A1 X{first_layer_print_min[0]} Y{first_layer_print_min[1]} I{first_layer_print_size[0]} J{first_layer_print_size[1]}
M400
M500 ; save cali dataM623
;===== bed leveling end ================================
Adaptive Purging G-Code | P1/X1 Supported
Adaptive purging is split into two parts. The first part checks the limits of the print and determines if it is possible to use adaptive purge line without running into print area limits. If it can, it generates a purge line next to the print. The second part is a fall back print line that should work as long as the bottom right corner of the bed is not occupied.
IS
;===== nozzle load line ===============================
M975 S1
G90
M83
T1000
G1 X18.0 Y1.0 Z0.8 F18000;Move to start position
M109 S{nozzle_temperature_initial_layer[initial_extruder]}
G1 Z0.2
G0 E2 F300
G0 X240 E15 F{outer_wall_volumetric_speed/(0.3*0.5) * 60}
G0 Y11 E0.700 F{outer_wall_volumetric_speed/(0.3*0.5)/ 4 * 60}
G0 X239.5
G0 E0.2
G0 Y1.5 E0.700
G0 X18 E15 F{outer_wall_volumetric_speed/(0.3*0.5) * 60}
M400
SHOULD BE
;===== nozzle load line ===============================
M975 S1
G90
M83
T1000
;check if okay to default to KAMP
{if ((first_layer_print_min[0] - 5 < 18) && (first_layer_print_min[1]-5 < 28)) || (first_layer_print_min[0] < 6) || (first_layer_print_min[1] < 6) || (first_layer_print_min[0] > 200)}
G1 X255.5 Y0.5 Z1.5 F18000;Move to start position
M109 S{nozzle_temperature_initial_layer[initial_extruder]}
G1 Z0.2
G0 E2 F300
M400
G1 X230.5 E25 F300
G0 X210 E1.36 F{outer_wall_volumetric_speed/(0.3*0.5) * 60}
G0 X186 E-0.5 F18000 ;Move quickly away
G1 Z1.5 E0.5 F4000;
{else} ;Fallback
G1 X{first_layer_print_min[0]-5} Y{first_layer_print_min[1]-5} Z1.5 F18000;Move to start position
M109 S{nozzle_temperature_initial_layer[initial_extruder]}
G1 Z0.8
G0 E2 F300
M400
G1 X{first_layer_print_min[0]+15} E20 F150
G0 X{first_layer_print_min[0]+45} F18000 ;Move quickly away
{endif}
M400
Textured Cool Plate Fix | P1/X1 Supported
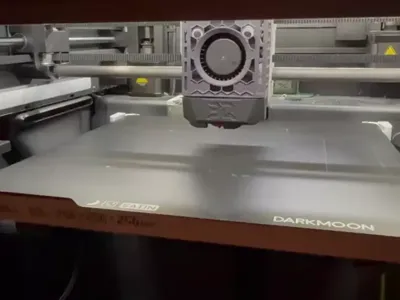
Orcaslicer recently implemented an additional build plate called the “Textured Cool Plate” to support plates like the Darkmoon ICE plate or the BiQu Cryogrip plate. However, this option does not affect the starting z-offset like intended. A fix adding this behavior is also implemented. This simply checks the name of the bed type and duplicates the behavior for the new plate.
IS
;===== for Textured PEI Plate , lower the nozzle as the nozzle was touching topmost of the texture when homing ==
;curr_bed_type={curr_bed_type}
{if (curr_bed_type=="Textured PEI Plate")}
G29.1 Z{-0.04} ; for Textured PEI Plate
{endif}
SHOULD BE
;===== for Textured PEI Plate , lower the nozzle as the nozzle was touching topmost of the texture when homing ==
;curr_bed_type={curr_bed_type}
{if (curr_bed_type=="Textured PEI Plate")}
G29.1 Z{-0.04} ; for Textured PEI Plate
{endif}
{if (curr_bed_type=="Textured Cool Plate")}
G29.1 Z{-0.04} ; for Textured PEI Plate
{endif}
Comment & Rating (19)