P1S side door perforated panel


Print Profile(1)
Description
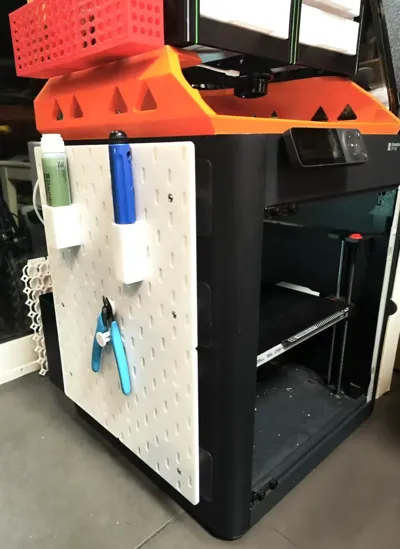
This pegboard mounts to the side panel of your P1S or X1, providing convenient storage for frequently used printer accessories such as bed adhesive, scrapers, and pliers.
Traditional pegboard installation requires drilling holes in the wall; this design utilizes adhesive nut mounts for a drill-free solution, adhering directly to the side panel.
Regarding adhesive nut mounts, procure M4 x 16mm fasteners—a 4mm screw diameter and 16mm length—ensuring accuracy in your selection.
A simple online search on platforms like Taobao or Pinduoduo will yield these; they cost approximately one dollar each, and at least six to eight are required (sixteen are needed if cylindrical pins aren't used for connection).


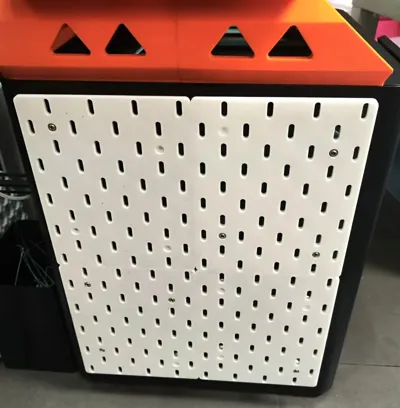
The pegboard features 2mm cylindrical pinholes around its perimeter, allowing for connection using 2 x 20mm cylindrical pins to enhance structural integrity (omission of cylindrical pins is acceptable, but necessitates more adhesive nut mounts to ensure each pegboard corner is securely fastened).
Installation Steps:
- Print four pegboard pieces (four copies of the same model). Gather M4 x 16 adhesive nut mounts and several 2 x 20mm cylindrical pins.
Insert the 2 x 20mm cylindrical pins into the small holes on the pegboard sides (this step can be skipped if cylindrical pins aren't utilized).

3. Connect the four pegboard pieces into a single unit using the pins.


4. Secure the adhesive nut mounts to the pegboard using screws. As illustrated, at least six adhesive nut mounts are recommended. If cylindrical pins are not used, each pegboard requires four mounts, totaling sixteen. A layer of material covers the pegboard's screw holes; simply pierce through it.


5. Remove the adhesive backing from the mounts and affix the pegboard to the printer's side panel. Subsequently, remove the screws, detaching the pegboard to leave the adhesive nut mounts adhered to the side panel.
Gently smooth out any air bubbles between the adhesive mounts and the side panel, ensuring a secure bond.


6. Once the adhesive nut mounts are firmly adhered, reattach the pegboard to them using the screws. Installation is complete.


License
You shall not share, sub-license, sell, rent, host, transfer, or distribute in any way the digital or 3D printed versions of this object, nor any other derivative work of this object in its digital or physical format (including - but not limited to - remixes of this object, and hosting on other digital platforms). The objects may not be used without permission in any way whatsoever in which you charge money, or collect fees.
Comment & Rating (4)