Free-flight glider "WingRay"


Print Profile(6)


Description
SIMPLE. FLYING. FUN.
This model is my first 3D-printed glider (though not the first flying model I’ve built myself 😉). Still, I’m truly grateful for the experience it gave me in understanding the principles of designing and building flying 3D models.
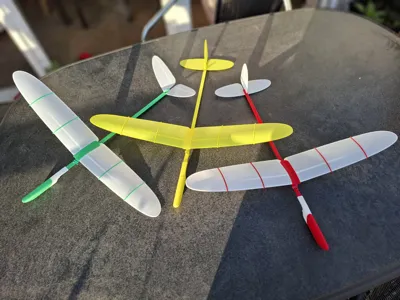
I’m also incredibly thankful to everyone who shared feedback on this and my other models — your insights constantly inspired me to rethink the design, find new ways to improve it, and explore new technological possibilities. Thank you all — I always save photos of your builds, and it genuinely makes me happy (and often makes me smile!) to see them.
After many months of feedback, it’s time to upgrade this base model.
That said, I’ll keep the original print profile unchanged — as a nod to where it all started…
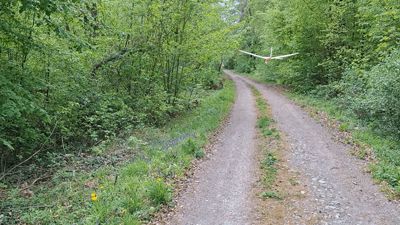
"WingRay / WingRay PRO" is a compact free-flying glider model for outdoor launches in calm weather. Model offers an excellent hands-on introduction to the basic principles of aircraft design, technology and flight mechanics.
The model is available in two configurations:
- Opt 1 – with traditional tail
- Opt 2 – with V-tail
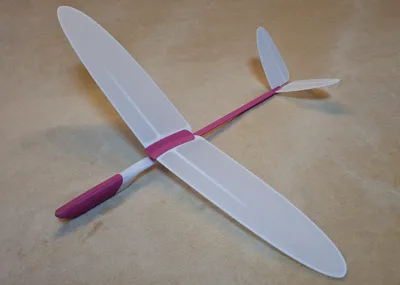
"WingRay" has wingspan 480mm and weight approximately 50 grams. The model comes pre-balanced and requires minimal adjustments for flight. To assemble the initial “WingRay” model follow the PDF instructions as attached to the model page.
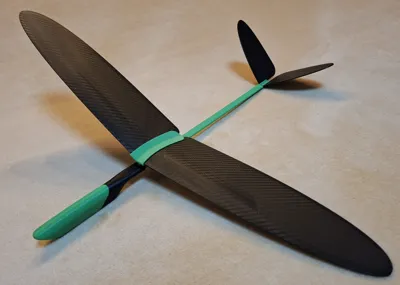
“WingRay PRO” is an improved version of “WingRay”. The model has a wingspan of 490 mm, length of 516 mm, and weighs approximately 65 grams. Model has an improved design of wing and has a movable wing position. This option provides the ability for very precise adjustment of the model’s aerodynamic focus and center of gravity, ensuring the most optimal, long-lasting, and beautiful flight.
To assemble “WingRay PRO” follow the instruction steps below.
1 - Model Assembly
The model consists of 15 parts, as shown in Figure 1.

1 – Balancer, 2 – Nose connector, 3 – Nose bracket, 4 – Beam A, 5 – Beam connector, 6 – Beam B, 7 – Tail connector, 8 – Vertical fin, 9 – Right stabilizer, 10 – Left stabilizer, 11 – Wing bracket, 12 – Right wing, 13 – Left wing, 14 – Large rib, 15 – Small rib.
Glue must be used where indicated by a special symbol. It is recommended to perform a first test assembly without glue to understand the assembly principles and check the fit of parts. Final assembly before flight must be done with glue. The SuperGlue is recommended.

Assemble the nose section (parts 1, 2, 3).
Assemble the boom (parts 4, 5, 6) — glue must be used during boom assembly.

Connect the assembled boom to the nose section (join parts 4 and 3).
The special markers on part 4 should face downward during assembly, symmetrically on both the right and left sides. Using glue for this connection is optional. However, if there is a significant gap, glue may be used to secure the parts.

Assemble the tail unit (Opt 1 – conventional tail design). When installing the stabilizer or fin, first insert its front end, then rotate it into the final position. A test assembly is recommended before applying glue. For the final assembly, be sure to use glue.

Assemble the tail unit (Opt 2 – V-tail configuration). When installing the stabilizer, first insert its front end, then rotate it into the final position. A test assembly is recommended before applying glue. For the final assembly, be sure to use glue.

Glue the assembled tail unit to the tail boom.

Assemble the wing. When installing the wing, first insert the front part, then rotate it into its final position. A test fit is recommended before applying glue. During assembly, make sure there are no gaps at the front section and that the wings are aligned correctly, as shown in the diagram. For the final assembly, be sure to use glue.

Install the ribs onto the wing. The ribs are placed into specially designed slots on the leading and trailing edges. A click will be heard when they are properly installed. Ensure that the ribs are positioned in the correct orientation relative to the direction of flight, following the curve of the wing bracket. Start with the larger rib (part 14), then install the smaller rib (part 15). No glue is used when installing the ribs.

The wing installation is very simple using any office rubber band, as shown in the illustration. The wing can be moved forward or backward if needed, allowing for precise adjustment of the model’s center of gravity.
2 - Model Adjustment and Flight
The model is designed for outdoor launches in calm, clear weather.
The initial CG position must be adjusted to approximately 20-23 mm from the wing leading edge.
Pitch adjustment is achieved by slightly moving the Wing forward (pitch up) or rearward (pitch down). Yaw adjustment is achieved by deflecting the rudder.
Happy Flights and Smooth Landings!
Boost Me (for free)
If you like my models, hit that Boost button like it's a launch switch! 🚀
Documentation (1)
License
You shall not share, sub-license, sell, rent, host, transfer, or distribute in any way the digital or 3D printed versions of this object, nor any other derivative work of this object in its digital or physical format (including - but not limited to - remixes of this object, and hosting on other digital platforms). The objects may not be used without permission in any way whatsoever in which you charge money, or collect fees.
Comment & Rating (667)