Key Organiser (Fully 3D Printable)


Print Profile(1)

Description
Key Organiser (Fully 3D Printable)
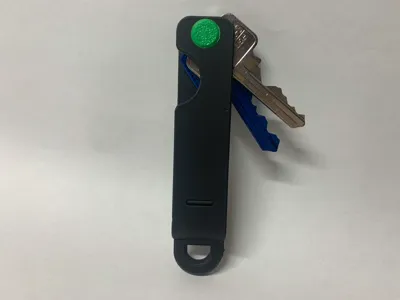
This Key Organiser is a simple and easy way to store, access and use up to four keys. It keeps keys stored within its dense and stylish form factor enabling for easy access with the finger cutout to slide out the keys and pick which one you need to use. The body of the organiser enables easy use of the selected key as it can be used as an ergonomic handle to add extra torque to the keys turn. This Key Organiser was designed to be (Fully 3D Printable) for keys no larger than 63mm in length, 2mm thick and with a hole cutout of 6mm. If your keys have a hole smaller than 6mm it will need to be drilled out to be 6mm in diameter with a 6mm drill bit.
Main Features
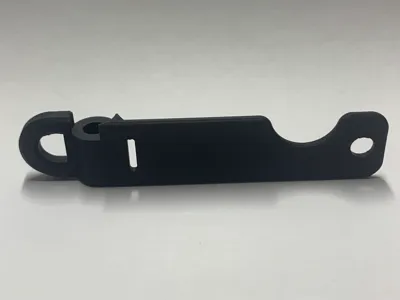
- Body - The Unique body of this Key organiser consists of two halves the bottom and top. The bottom half consists of a male press fit hinge half and money clip/ clip whilst the top half consists of the female press fit hinge half, a keyring attachment point and a finger cutout for easy access to keys. Both halves of the organiser contain the 6mm hole that houses the shaft which holds the keys. The two halves also have a locking mechanism that locks the hinge in its closed position made up by an extrusion from the bottom part that cuts through the top half that locks the hinge when clicked into place. The unique design of the body and snap fit hinge that locks it into place adds strength and makes it easier and more user friendly to load and unload keys into the organiser. (TIP: Assembly Step 2 shows how to put body halves together).
- Locking Pin - The locking pin is designed to a thickness of 5.95mm in diameter with a tolerance of 0.025mm between it and the organiser not allowing for any play between the organiser or the pin whilst turning in the lock. This 5.95mm pin also enables the 6mm holed keys to have less play making the whole organiser better to use and stronger. It is designed with a snap fit which is very tight on the first fitment. (TIP: Snap fit the Locking Pins male and female parts together about 4-5 times before fully constructing the key organiser and remove with tools if required on the first fitment Assembly Step 3 the Locking Pin can also be superglued together to ensure that keys aren't lost).
Key Spacers - The key Spacers are designed to be 2mm thick just like a key and have a 6.15mm hole cutout in the center to easily slide over the locking pin and act as a spacer between keys. They are intended to be used in place of keys if you aren't using four keys filling the entirety of the key organiser. (TIP: Assembly Step 4 below displays how to set out the key organiser with two keys).
Assembly Guide
Step 1: Collect/ Print All Parts (Body Top/Bottom, Locking Pin Male/Female & Key Spacers x3).

Step 2: Assemble body, place male snap fit hinge into female and press down until it snaps fully into place.

Step 3 (Optional): Loosen the male and female locking pins press fit by clipping both male and female together and removing them four to five times. The first time may be very tight and could require tools such as a Stanley knife or Plyers to remove, from there hand use is optimal. (Only if you want to load and unload keys often without risk of snapping the body or risk using tools on it).

Step 4: Load/ add keys and necessary spacers/ washers according to the pattern shown below if possible with a spacer in between each key unless you have more than 2 keys. Otherwise you need to have a total of 8mm of washers or keys on the locking pin which can be made up of three 2mm washers and one key or four keys for example.

Step 5: Clip body together over locking pin and place male snap fit component over the locking pin to hold the whole organiser together completing the assembly.

Assembly Complete
Disassembly (How To Unload Keys)
Step 1: If you loosened the locking pin's male and female snap fit fastening as shown in Assembly Step 3 then no tools are required. However If you didn't complete step 3 then you will need to make use of tools and risk damaging the body.

Disassembly Complete
Boost Me (for free)
Thanks For The Support!
License
You shall not share, sub-license, sell, rent, host, transfer, or distribute in any way the digital or 3D printed versions of this object, nor any other derivative work of this object in its digital or physical format (including - but not limited to - remixes of this object, and hosting on other digital platforms). The objects may not be used without permission in any way whatsoever in which you charge money, or collect fees.
Comment & Rating (18)