Ultimate Lightbar for Bambu Lab A1 / A1 mini


Print Profile(3)


Bill of Materials

Description
--** UPDATE 17.01.2025 **--
Ultimate Lightbar for A1/A1 mini has received an update! From now on, the model is available with a dedicated light diffuser.
The diffuser is available for two versions of PLA filament - white (or any other color) and transparent. The models differ in construction to provide the right amount of light depending on the filament.
Let me know how you like the change. If you are happy, I encourage you to add Boost :) It helps a lot in development!
I needed additional lighting for my Bambulab A1 printer. Unfortunately, none of the models available on Makreworld suited me, so I searched for something easy to mount, simple to print, and that didn’t require NASA-level knowledge to connect it to the printer. My priority was to power it directly from the printer, avoiding the need for a separate power supply and keeping my outlets free.
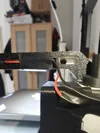
I designed my own LightBar specifically for the A1 and A1 Mini series printers. It perfectly matches the printer in terms of both fit and appearance. The model is straightforward to print and assemble. It is based on an inexpensive LED strip from Aliexpress, which already comes with a dedicated connector for the printer. You can find the link to the LED strip here:
https://pl.aliexpress.com/item/1005007463666924.html
- Printing instructions:
- Material: PETG at a minimum, due to its heat resistance (LEDs can get warm)
- Layer height: 0.16 mm
- Supports: none
- Printing time:
1:24 h / X1C
1:41 h / A1
Assembly instructions:
- Desolder the cable included with the LED strip.
- Thread the cable through the mounting arm and the mounting pin (make sure the longer smooth side is the one you feed the cable through).
- Feed the cable through the hole in the LED strip holder.
- Resolder the LED strip back to the cable, ensuring proper polarity of the wires and the strip.
- Remove the protective film from the adhesive side of the LED strip.
- Attach the LED strip to the recess in the LED arm.
- Apply glue to the inside of the hole for the mounting pin.
- Insert the mounting pin into the LED strip holder in the appropriate spot and wait a few minutes.
- Attach the mounting arm to the filament cutting arm on the printer. You should hear a satisfying "click" at some point!
- Adjusting the angle of the LED strip, insert the strip using the mounting pin into the hole in the mounting arm.
- If needed, adjust the angle by removing and re-inserting the strip into the arm.
Warning for Nozzle Clamping Detection feauture:
To ensure 100% safety for your printed model, please disable the "Nozzle Clamping Detection" feature. During bigger taller prints, the light bar may come into contact with the model while performing the nozzle test, which could lead to a print failure. Disabling this feature will help prevent such issues.
Enjoy viewing your prints! 😊
Boost Me (for free)
Do You like my model? Give a BOOST :) It really helps to develope new features and design new addons to Your printer!
License
You shall not share, sub-license, sell, rent, host, transfer, or distribute in any way the digital or 3D printed versions of this object, nor any other derivative work of this object in its digital or physical format (including - but not limited to - remixes of this object, and hosting on other digital platforms). The objects may not be used without permission in any way whatsoever in which you charge money, or collect fees.
Comment & Rating (117)