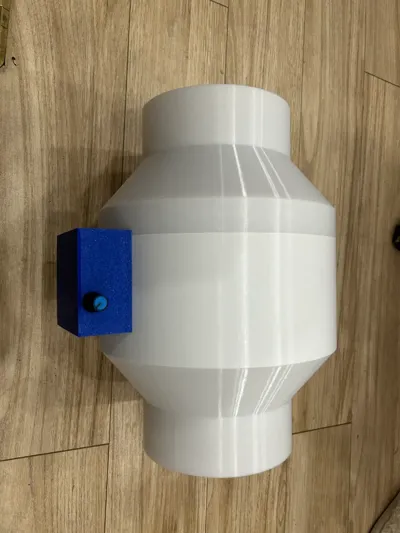
150mm Duct Fan


Print Profile(1)

Description
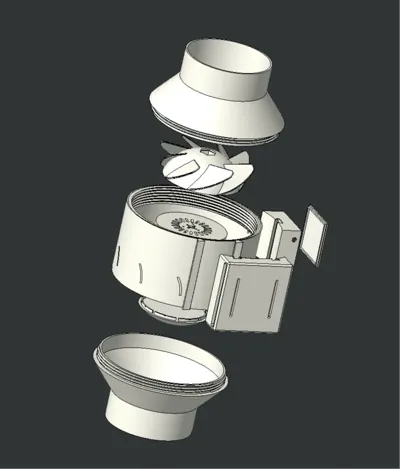
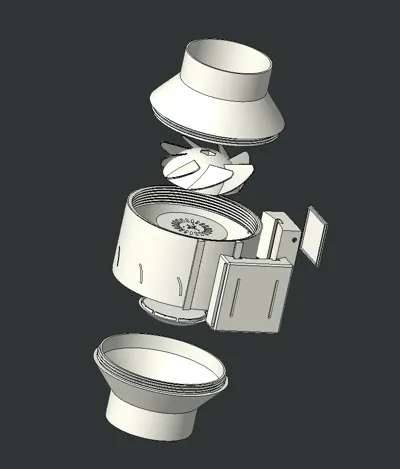
3D printing can solve many problems in daily life, but with long-term indoor printing and not liking to open windows in winter, there is an urgent need for a duct fan for indoor ventilation. This duct fan has a diameter of 150mm (I calculated the cost, it's not worth it to make it small compared to buying a finished product, but 3D printed items can be creative based on your actual needs, and I'll decide whether to release a mini version based on feedback). The required accessories are as follows: Before printing, be sure to read the following instructions to avoid wasting materials:
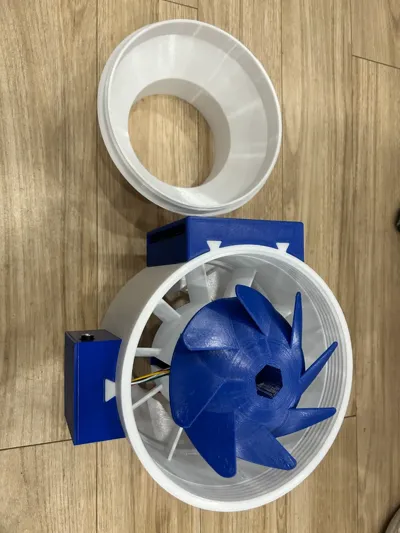
1. Motor
Based on the characteristics of the duct fan, I chose a high-speed, relatively low-noise motor using CLK speed control. Although it's not as fast as PWM in response speed, for me, I won't frequently adjust the speed. Turning on and running is enough for my needs, 2 hours a day is enough to basically ventilate the room once
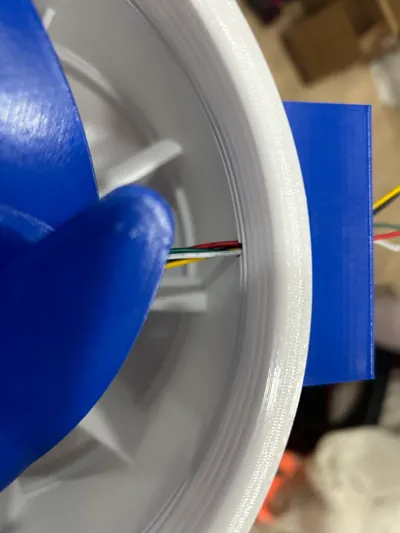
Special note: The duct fan motor rotates counter-clockwise, which is reverse rotation. This motor needs to be modified for reverse rotation, by simply swapping any two UVW wires. Since the wires will cross, insulation is required (use high-temperature tape for insulation),
Other motor models can be modified by yourself according to the manufacturer's instructions. Just make sure the size fits

2. The speed controller is CLK speed control. Any CLK speed controller is fine. I chose a compact one with a switch

3. Power supply and connector:
This motor is 24V, the connector is DC 5525, thread size: M8

4. Wiring and installation precautions:
1) Installation
Be sure to install the blue control board box onto the main body, then thread the wires through the hole

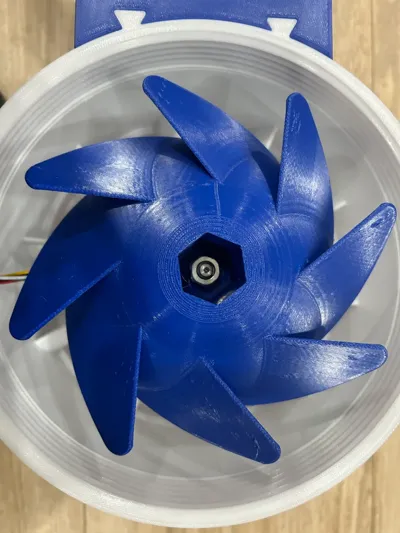
2) In the 3MF file, plate 2 and plate 3 are different, plate 3 file is assembled on the fan blade side
PS. If installed incorrectly, the fan blades will rub against the side wall

3) Due to the motor's reverse rotation, two M8 left-hand nuts are needed, one for fastening, one for anti-loosening
Using only one nut will definitely loosen

4) Wiring:

Above, if you have any questions, you can leave a comment or send a private message
License
You shall not share, sub-license, sell, rent, host, transfer, or distribute in any way the digital or 3D printed versions of this object, nor any other derivative work of this object in its digital or physical format (including - but not limited to - remixes of this object, and hosting on other digital platforms). The objects may not be used without permission in any way whatsoever in which you charge money, or collect fees.
Comment & Rating (0)