
Airsoft Grenade v2.1
Print Profile(1)

Description
This model is now outdated. Please use V3 Grenade System
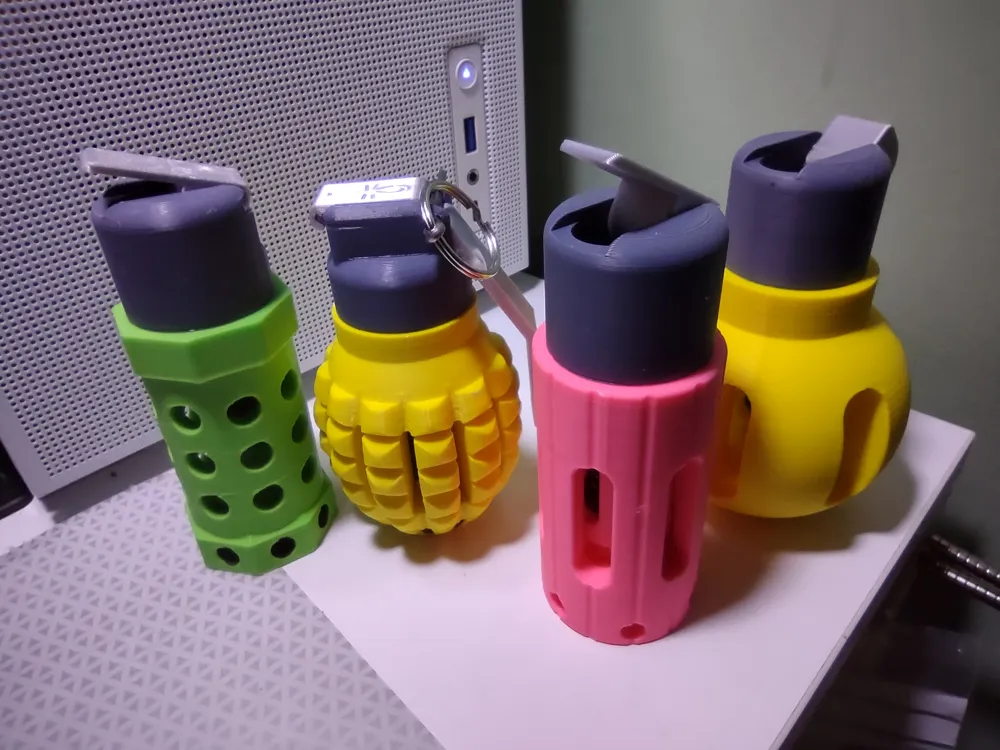
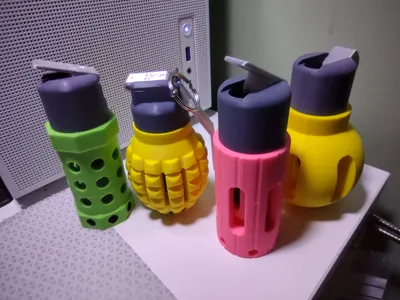
This is Version 2 of my easily printable and customizable “grenade” for use in Airsoft games and other similar sports. This version uses 209W shotshell primers, but is also compatible with the 8-shot ring caps from the v1 system. The v1 fuse system and ring carriers work just as well in these redesigned grenade bodies, but please dont try using primers in those bodies, use the v2 bodies which have better venting. The v2 fuse is tweaked to accept an M6 grub screw with a pointed end, or if you have the tools make a pointed end on a 55mm M6 bolt and omit the nylock securing nut.
Hardware Required
- 1x M6 60mm grub screw
- 1x M6 nylock nut
- 2x M2 6mm counter sunk screws
- 1x 14mm OD, 1.2mm wire, 50mm compression spring
Parts to Print
- fuse_body (I recommend 4 walls, 20% gyroid, in PLA+)
- fuse_safety or fuse_safety_nodetent
- fuse_lid
- striker and sear (print 100% in PLA+ or other tough material)
- Both the carrier and carrier cage (print 100% in PLA+ or other tough material)
- One of the body's
Options
- You will need one of the following Fuse types:-
- Fuse: Twist head fuse
- Fuse: Spoon-like flip top fuse - FlipTop
- Fuse: Pull pin and detatchable spoon fuse - Pin & Spoon style
- Clip: Molle compatible parametric belt clip - MOLLE Clip
- Body: Simple tube shape with oval vents - Included
- Body: Flash-bang style cylindrical shape - Included
- Body: “Pineapple” styled grenade body - Included
- Body: “L2A2” styled ovoid with central ring marking - Included
- Body: Simple spherical ball style grenade body - Included
- Choice of Primer or 8-shot cap ring for percussion.
Instructions
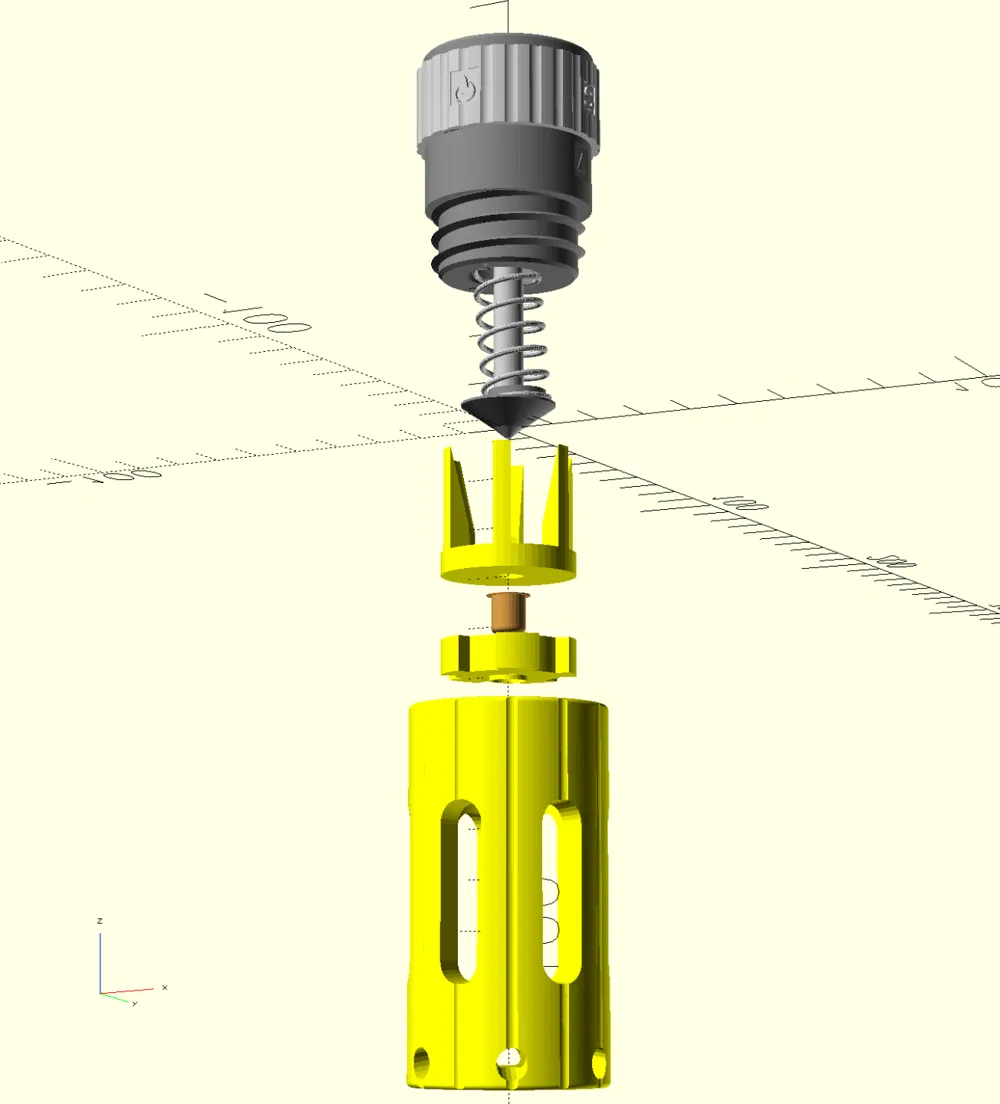
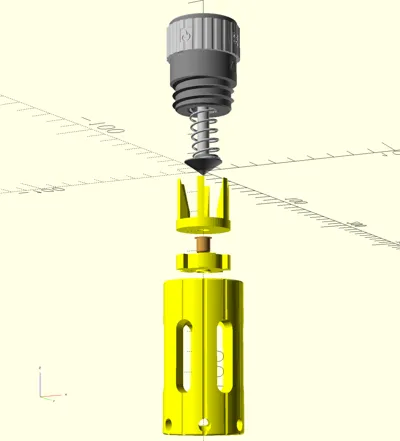
To Assemble, first screw the sear onto the blunt end of the M6 grub screw, far enough to leave just enough room for the nylock nut which you should then screw on to prevent the sear from creeping up the bolt. Insert bolt with it's sear down through the fuse_body. Thread the spring onto the bolt from below, it should fit snuggly into the bottom of the base, then screw the striker onto the end. the smaller side of the striker should fit into the spring, screw it on until the the tip of the pointed end of the grub screw protrudes by a couple of mm from the striker. Then complete assembly of your chosen fuse.
Operation
Unscrew the fuse assembly from the body, it should only be hand tight. Set your fuse to armed and push the striker up into the fuse, it should lean sidewise and catch on the shelf and stay compressed. If you have trouble getting it to stay armed you can twist the striker end and you should find that it is at it's most stable when the arrow on the striker and the arrow on the bottom of the fuse point at each other. Once it is cocked, you can set your fuse to safe and it is now safe to handle without fear of triggering.
Now gently press a primer, it is designed to fit fiocchi 209 W type primers, into the primer_carrier plate on the side with a recess. Now place the carrier into the body of the grenade, i find holding it upside down and pressing it most of the way home with my thumb works the best, the protruding alignment ring on the bottom of the carrier should slot into the hole in the base of the grenade cavity. Now slide the carrier alignment cage in ontop of it, flat side down, this should both help to secure the primer in place and will ensure that the striker hits the primer right in the center, if you leave the cage out then the primer may not fire reliably.
Once the carrier plate and alignment cage are inserted you can screw the fuse assembly into the body, the direction to tighten the two together is also the direction that engages the safety, so it should be difficult to accidentally trigger it. When you are ready to use, turn the safety ring 90° counter clockwise to the ‘armed’ position, the ring protrudes when armed as a visual indicator, it also exposes the word ‘armed’ on the top surface, and the side indicator points at the ‘fire’ logo. You may now drop or gently throw the device at any hard surface and it should trigger with a loud noise. If you are having unreliable results try adjusting the alignment of the striker wrt to the fuse body as above to make it more sensitive.
Important Notice
This is a toy, it uses shotshell primers to make it's noise, please ensure that those are legal to possess in your country. no part should detach when used and it is not for self defence use. USE AT YOUR OWN RISK. Suitable for use in Airsoft, Paintball, and other Mil-Sim type games only. The noise is quite loud and should not be used next to anyone's ear or face incase of hearing damage, nor should it be used anywhere that may start a fire. Please follow the safety instructions included with the primers you are using, and always follow the directions of any marshalls or safety officers in the game you are playing.
Addendum
This is an updated version of my Airsoft 8-cap ring grenade system to use the louder primer caps that are readily available in the UK, I have kept compatibility with that previous version where possible, and I have tested that the 8-ring carriers still work fine with this body and fuse, you can also use the v1 fuse with the flat striker along with the 8-ring carrier in these body designs. These body designs have much better venting, designed to cope with the much higher discharge from a primer, which may also discolour light coloured prints, especially the lowest level vent area. Please make sure to use adequate strength materials, PLA+ and 4 walls minimum.
As always I have made this for fun and the benefit of the Airsoft community, if you have any suggestions for improvement, or wish to print these on a commercial basis, please contact me.
Revisions
- v2.0 - Initial 209 primer support
- 2.1 - Small changes to the internals of each body to improve venting efficiency and strength at key stress points.
License



Comment & Rating (84)