Pegboard Desk Clamp


Print Profile(3)

Description
If you are interested in my other designs, you can browse my homepage or collections IKEA Skadis and accessories Modular storage box 1:2000 boat model 1:700&1:350&chibi versions Daily necessities 3D printing related Toy
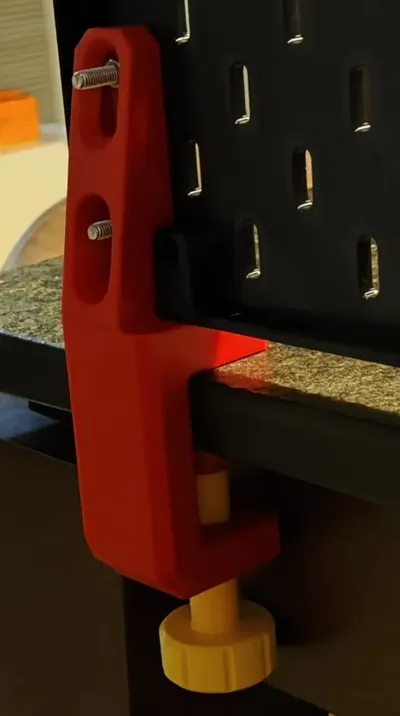
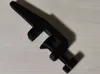
A few days ago, some netizens suggested that my pegboard could not use desktop clamps designed by others online because I added a frame to the board to strengthen the pegboard...
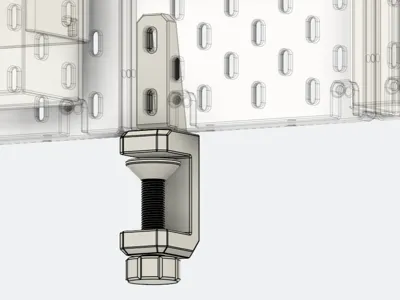
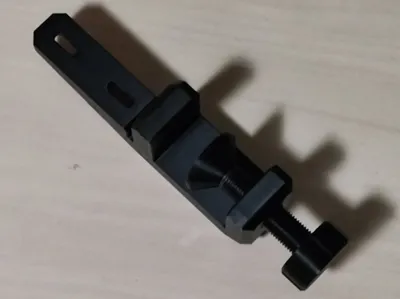
So I have now designed a set of pegboard desktop clamps, not only for my pegboard but also for others compatible with IKEA pegboard hole spacing, and theoretically, 6mm round hole pegboards should also be usable
Considering strength, it is better to use metal screws for the connection between the pegboard and the clamp, using screws with a diameter of 5mm and a length greater than 10mm for fixing
The maximum desktop thickness used by the clamp does not exceed 34mm, if you need to clamp a thicker desktop, please tell me, I can adjust the size
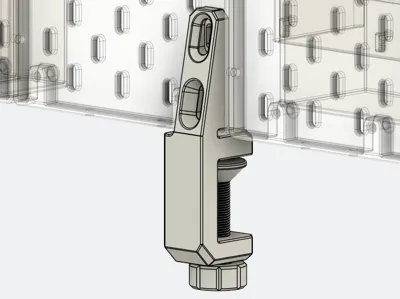
I used Jayo and Tianrui PETG for printing, the tolerance of the bottom bolt was tested in several sizes, what is currently provided is what I found to be smoother in use
But considering the different sinkage rates of different filaments, I provide a bolt with a diameter reduced by 0.1mm in the plate two
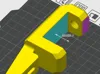
For strength, the bracket is printed lying down, so its screw hole might be slightly deformed, when screwing in the bolt for the first time, you can screw it back and forth a few times, make sure the bolt is not slanted
If it's very tight, you can try the bolt from the plate two
After the bolt can be screwed smoothly, just gently push that small round disk onto the top of the bolt
If you have any questions or suggestions during use, feel free to leave a comment, let's improve it together
2025.1.19
Previously, I mirrored the clamp part in the slicer software, which might have caused the threads to be reversed, now I have created the other side of the clamp in the modeling software, the print profile has been updated
Boost Me (for free)
If you like my designs, welcome to boost me, thank you
License
You shall not share, sub-license, sell, rent, host, transfer, or distribute in any way the digital or 3D printed versions of this object, nor any other derivative work of this object in its digital or physical format (including - but not limited to - remixes of this object, and hosting on other digital platforms). The objects may not be used without permission in any way whatsoever in which you charge money, or collect fees.
Comment & Rating (59)