


Print Profile(3)


Description
I had several leftover LED strips from previous lightbox projects and decided to repurpose them into a decorative 12V garden light. This design is straightforward to 3D print and requires only a few additional components, making it an eco-friendly way to upcycle unused materials.
By reusing existing LED strips, this project not only reduces waste but also creates a functional and stylish outdoor lighting solution.
Additional Items Needed:
- 2 x M3 8mm bolts
- 2 x M3 nuts
- Waterproof silicone
- Wire (length and type dependent on your setup/needs)
Printing and Materials
For this build I used white PETG HF from Bambu Lab and for the outer lamp I used Gembird transparent PETG, although not completely clear I liked the opaqueness it left, as it hid the internals.
Plate One
Contains the light base, base connector, nut and inner casing for the light
Plate Two
Contains the outer light casing, please note it changes from white to clear at layer 22 (4.40 mm)
Building
The build is relatively simple to achieve using the following steps:
Step 1
Insert the 2 M3 nuts into the connecting base

Step 2
Attach the light base to the connecting base using the 2 M3 bolts

Step 3
Get a strip of LED, here I used 4 connecting RGB, however I only wanted white so the RGB is connected together, you could if required only use 4 core wire to have fully interactive lights if required. Connect the LED strip to the wire. Please note in the background of this picture there is a jig to hold the light whilst assembling (see print profiles above).
IF you do not have any LED connectors please see this profile (https://makerworld.com/en/models/950905#profileId-918789) it was made to be used as part of these lights but was released as a seperate print as it has other uses).

Step 4
Wrap the led strip around the inner light section, the LED light strips I use have a sticky back, you just have to remove the blue tape. Please note the wire connecting end should be able to go into the slit at the top.


Step 5
Get your connecting wire and feed it through the hole in the base unit (the jig makes it easer to hold items)

Step 6
Connect the connecting wire to the LED strip and put into the center light holder.

Step 7
Add silicon to seal up the wire inside from the base, this will prevent moisture or any water entering in or around the electrics.

Step 8
Put the center of the light onto the base unit and add more silicon in the well as shown.

Step 9
Attach the lid, this should be a snug fit and will join with the silicon from the previous step. Make sure you wipe of any excess silicon from the outside.

Step 10
Test to make sure it works and then let it all dry.

Step 11
Attach the ground stake using the large nut (separate print profile)

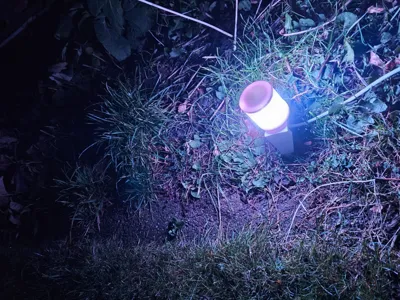
Step 12
Deploy

What's Next
I will be designing different holders for the lamp, after the small ground stake I will be adding a wall mounted holder. If you wish to design your own holder the hole required for the nut/bolt should be 20.5mm in size.
Hope you enjoy ;-)
Comment & Rating (0)