Ergo Capsule A1


Print Profile(2)


Description
Boost Me (for free)
I usually don’t ask for this, but I’ve noticed that many creators actively encourage it on other platforms—and it makes sense, as it helps increase visibility. So, if you can follow me, it would make difference. It’s a great way to support my work and show appreciation. For more insight subscribe my blog at: https://designrepcom.com/ This design is freely available for the community, but if you enjoy my work and would like to show your support, you can boost this project. Thanks!
Introduction
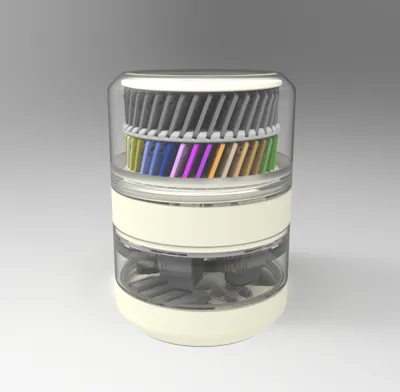
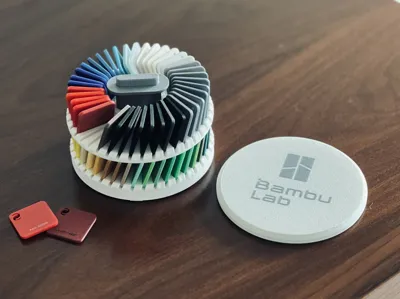
Once again, this project brings something that might be new to some – The printing of translucent materials.
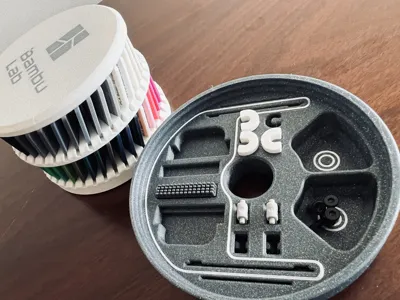
This version of the capsule is for the A1 and includes areas for:
- Color Swatches
- All nozzle Sizes:
- Heatbed Nozzle Wiper - A1 mini (A1 coming)
- Replacement Filament Cutter - A1 Series
If you need any of this, use this links, I will get a small help and will cost you the same.
I’ve written an article on my blog titled ‘To What Extent and How Can Transparent PETG Parts Be Achieved?’ It would be great if you could follow me there—I use it to share projects like this and occasionally present some of my preliminary work.
Despite being discussed in previous projects, it's something I find interesting and quite challenging to achieve with an FDM printer like the A1. The trick is to print slowly and at a high temperature, as widely shared on the internet. With this information in mind, it becomes evident that increasing the number of layers will result in a higher level of opacity for the wall. If you possess a nozzle with a diameter of 0.6mm or even 0.8mm, now is the opportune moment to employ it. Experimentation is key in determining what works best for your specific needs, as optimal results may be influenced by various variables. Your goal is to achieve both translucency and mechanical resistance, making it essential to explore and find the most suitable approach for your desired outcome.

For achieving a "frost" effect, a 0.4mm nozzle is the optimal choice. Remarkably, there's no need for any intricate settings—simply stick to the default ones, and the outcome will perfectly mirror the images you've seen. Ensuring the material, especially transparent PETG, is as dry as possible is paramount. Excess moisture significantly impacts the performance of this material. Additionally, transparent PLA is also available for those seeking alternatives.

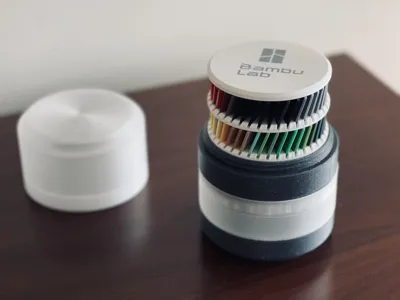
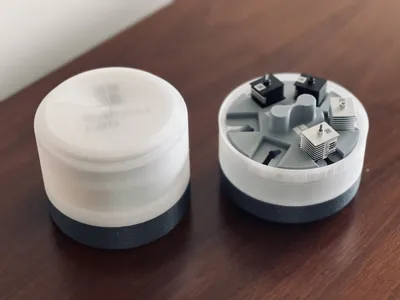
Regarding the base, you can make a TPU Ring or you can use a foam with the same shape. If you are interested in a foam ring, please send me a message.

Suspended swatches configuration
This effect can be easily achieved with a downloadable special part.
You can find these color swatches here.

Just change the filament settings as needed to suite your preferences, all the rest should be ok.
This design is free for the benefit of the community, but If you like my designs and want to contribute, you can make a donation on PayPal
For a small help, use this affiliate link to buy filament, it will cost you the same. Thanks!
Filaments used on this project
Change log
- (09-01-2024) - Added the A1 printer Bottom part
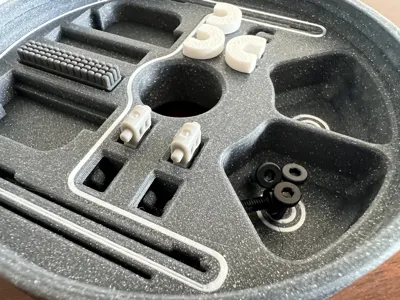
- (15-04-2024) Update to the A1 (not mini) bottom part. This printer has a larger Silicone nozzle now wiper, and no metallic nozzle scraper, so I've added 2more areas for screws, and more pockets (Bottom_ring_A1.3mf). You will need more 4 magnets, total 6 magnets of 10x3mm.
- Note: Click on "Download STL" to see this and other files.
- (15-04-2024) Update to the A1 (not mini) bottom part. This printer has a larger Silicone nozzle now wiper, and no metallic nozzle scraper, so I've added 2more areas for screws, and more pockets (Bottom_ring_A1.3mf). You will need more 4 magnets, total 6 magnets of 10x3mm.

Curious About My Tools? Check This Out!
For those of you who often ask about the tools I use to bring ideas to life, this article, The Journey From Idea To Object (Part I), offers some insights into the initial stages. It highlights the use of various tools, including software like Autodesk Fusion for CAD design, Blender for render and Bambu Studio for 3D printing preparation, and other... So, if you're curious about the software and hardware too, that I've incorporate in my workflow, take a look at the link for more details!" – Visit https://designrepcom.com/ for much more.
Comment & Rating (262)