A1 Mini Z Axis Cap with Cable Guide


Print Profile(1)

Description
Big thanks to Vsin for uploading the F360 file for the original.
Theirs was a basic A1 Mini Z axis top cap.
What my remix adds/changes:
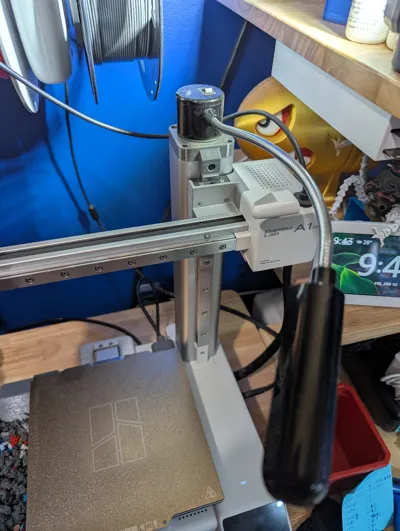
- Shortened the height of the main cap piece to 12mm; it was originally 16mm. 12mm better suited my purpose. I also slightly enlarged the main body to be closer in size to the stock A1 mini cap.
- Added a cable guide/guard that the cable for the mini goes into so it can't snag on anything. I made sure to leave enough space (12mm) between the inside of the cable guide and the back of the Z axis post so no stress or pinching occurs, a problem I had with some of the other models I've printed. I also made it a bit taller than the typical Z axis cable guide so the cable has more freedom.
Installation is easy; you need an M2 hex wrench/driver. Just undo the front screw on the stock Z axis cap and remove it, then remove the three screws used to secure the white “undercap” in place. You won't need the white piece or the original cap, so throw them in your printer parts drawer. From there, the printed replacement easily fits into place. Make sure you route the wire in the recess on the printed part. Then just put all the screws back in their original places and you're good.
I like that this variant has a flat top. I was able to easily attach an LED gooseneck light (affiliate links: single light, or two pack of lights) for better lighting.
Printed with anycubic (sunlu) gray PETG.
Thanks for stopping by!

Comment & Rating (1)