Mecha Great Serpent Bina, Blue Archive Total Force Battle BOSS


Print Profile(2)
Description
Membership

A contemplative observer who profoundly understands the nuances of differenceBinah
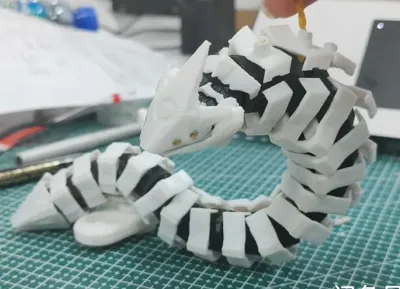
The third prophet of the Jumonji divine name. A colossal artificial intelligence construct embodying a fusion of serpentine and cetacean forms (essentially, a serpent-whale).
Its name originates from Binah, the third node on the Kabbalistic Tree of Life,
Its genesis and operational mechanisms remain enigmatic,
Speculation suggests involvement of advanced technologies exceeding the capabilities of modern science.
Caution: The model comprises numerous minute components. Before printing, ensure the build plate is clean or pre-treated with adhesive, and avoid using “狂暴模式”. Assembly requires super glue. Print and assemble in plate order to prevent part confusion.
Craft a magnificent serpent for the Year of the Snake~
Let Blue Archive have its own articulated serpent!
If you appreciate it, please show your support~
Wishing all teachers a Happy New Year and top-tier performance in Total Force Battles!
Boost Me (for free)
Thank you for your support!
Assembly Instructions:
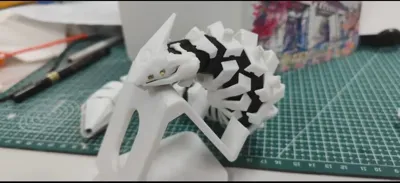
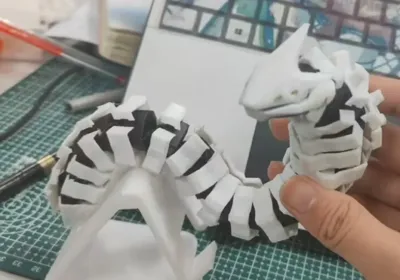
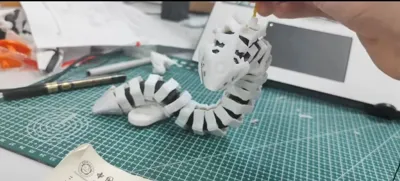
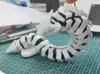
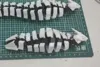
The serpent is divided into joints and armor. No AMS is required. Joints are recommended in black filament and printed on the first plate; these require no supports. Armor should be printed in white filament. The armor is divided into three sections: the head (the first seven segments, along with the tail, all printed on the second plate), the midsection (the ten middle segments—identical—all printed on the third plate), and the tail (the final segment).
It is advised to print in the designated plate order, assembling each plate after completion. Refer to the images for assembly.
Head and Tail: When removing supports from the head, exercise caution to avoid damaging the central section. The armor is divided into upper and lower parts; the upper part has angled slots, while the lower part has straight slots. Refer to the image below for the recommended assembly sequence, beginning with the head (on the right). Apply adhesive to the base of the armor slots. (From right to left, the right side is the head)

Midsection: All armor pieces are identical; simply separate and install the upper and lower parts.

Completed Model:

Membership
License
You shall not share, sub-license, sell, rent, host, transfer, or distribute in any way the digital or 3D printed versions of this object, nor any other derivative work of this object in its digital or physical format (including - but not limited to - remixes of this object, and hosting on other digital platforms). The objects may not be used without permission in any way whatsoever in which you charge money, or collect fees.
Comment & Rating (13)