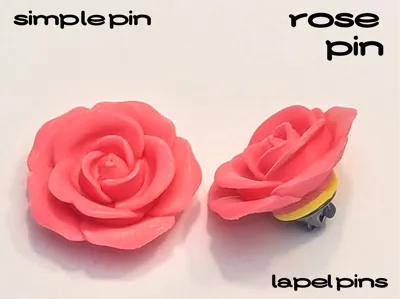
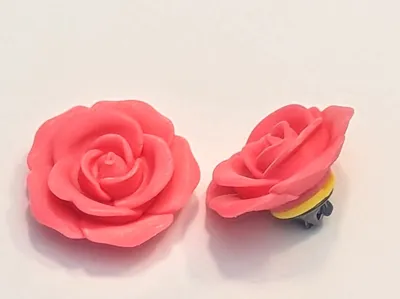
Rose Pin - Simple Lapel Pin


Print Profile(1)

Description
A remix of a rose earring turned into a lapel pin. Print in pink and red and make yourself a set.
Remixed by cutting the base off and making it fit the SimplePin lapel pin backplate system.
Perfect as a shirt pin, backpack pin, or really pin them to anything you feel like.
- Print Pin and Pin Backplate
- Add hardware pin to Backplate
- Clip Pin to Backplate.
- Done.
*There is a notch in the backing so you can change them by popping the pieces back apart.
Part of the SimplePin Collection - https://makerworld.com/en/collections/4330701
SimplePin Details and Information
SimplePin is a 2 piece system for making lapel pins.
SimplePins consist of a few parts:
- Pin
- Pin Backplate
- Hardware Pin (non 3d)
- Hardware Pin Back (non 3d)

Pin
- the part with the logo, image, text, etc
- 3 clip insets for attaching to Backplate securely
- removable from backplate with notch and a bit of force
- may need a small flathead screwdriver
Pin Backplate
- notch and hole for butterfly pin and nub that most butterfly pins have
- the pin hole and nub hole are made very small to help hold in place without glue
Hardware Parts
- Butterfly Cluth Pins with Pin Back
- The cutout fits 4.5mm diameter pinheads. I have purchased those labelled as 4mm but even they were 4.4mm diameter.
- If you get pinheads that are smaller the friction of the pin should keep in place but a touch of glue will do the trick if not.
- If you have pinheads larger than 4.5mm they will still work just wont fit in the inset fully.


You can buy them on Amazon for around 10 cents each and even cheaper on Aliexpress
Adding pin to Backplate


Boost Me (for free)
Thanks in advance, every Boost is appreciated. If not, let me know in the comments how to improve or just leave a like.
Check out my other collections:
- Christmas Ornaments - https://makerworld.com/en/collections/16207606
- SFModular Swappable Coaster Sets - https://makerworld.com/en/collections/3828298-sfmodular-coaster-sets
- SimplePin Lapel Pins - https://makerworld.com/en/collections/4330701-fritz3d-simplepin-lapel-pins
- Dummy 13 Models - https://makerworld.com/en/collections/5010156-fritz3d-dummy-13
- Valentines Day Collection - https://makerworld.com/en/collections/4469171-fritz3d-valentines
- SimpleTag Name Tag System - https://makerworld.com/en/collections/3733512-fritz3d-simpletag-name-tags
- Keychains Collection - https://makerworld.com/en/collections/4469136-fritz3d-keychains

Comment & Rating (19)