Food Dehydrator Filament Dryer


Print Profile(4)


Bill of Materials
- LebensmittelDehydrator x 1: https://www.ebay.de/itm/396080818852?mkcid=16&mkevt=1&mkrid=707-127634-2357-0&ssspo=xqsx1qottbk&sssrc=2047675&ssuid=&widget_ver=artemis&media=COPY
- Tortenhaube x 1: Nutdurchmesser27mm
- M4-Schrauben x 4:
- M-Muttern x 4:
- PTFE-Schlauch x 1:
- Bohrmaschine x 1:
- D4 Bohrer x 1:
- Schneidemesser x 1: z.B.Skalpell oderEntgrater
Description
Seeking a budget-friendly filament dryer capable of reaching 70°C, particularly for TPU (but also PLA, PETG, or ASA), I discovered that a food dehydrator, with minor modifications, functions admirably.

I sourced this food dehydrator on eBay:

Beyond the dehydrator, I only required:
- a cake dome (27mm groove diameter)
- TPU filament
- ASA filament (or similar, with a softening temperature exceeding 70°C)
- four M4 screws and nuts
- a drill with a 4mm bit
- a utility knife
- PTFE tubing
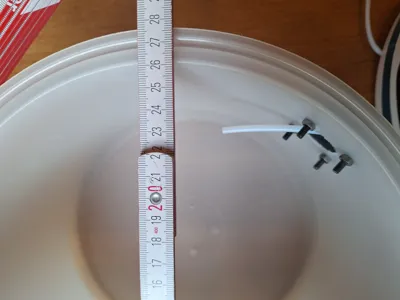
Fortuitously, my existing cake dome boasted a 27mm groove, fitting perfectly onto the dehydrator's lip (after gentle warming).


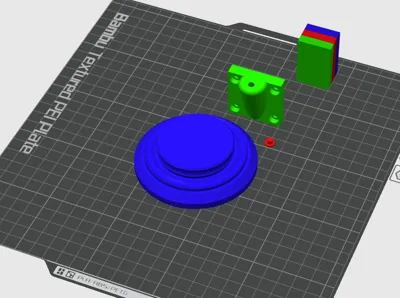
Modifying the cake dome proceeds as follows: First, drill several 4mm holes in the top to allow for moisture escape, which can be sealed with TPU plugs. Then, drill a lateral hole to accommodate the filament, expanding it as needed with a utility knife. The filament guide component now accepts the PTFE tubing (requiring potential minor reaming). Secure the guide to the dome, ensuring proper tubing alignment before fastening everything with the M4 screws. That’s it.


The receptacle precisely fits onto the small central white plastic disc of the dehydrator:


Overall, this project proved a delightful undertaking involving more crafting than 3D printing, yet I believe a cost-effective filament dryer is indispensable for a serious 3D printer enthusiast :)
Happy crafting!
Feel free to explore my Printables and Thingiverse profiles :)
https://www.printables.com/@TommsenPrint_2852944
https://www.thingiverse.com/tommsenthings/designs
Comment & Rating (1)