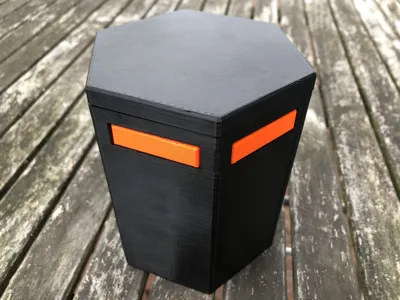
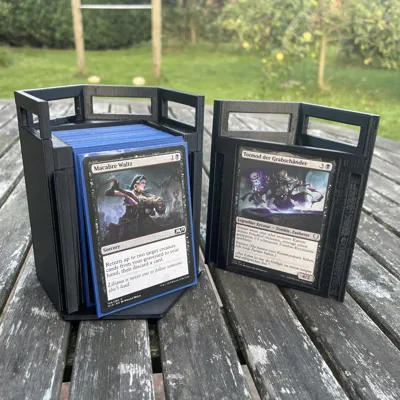
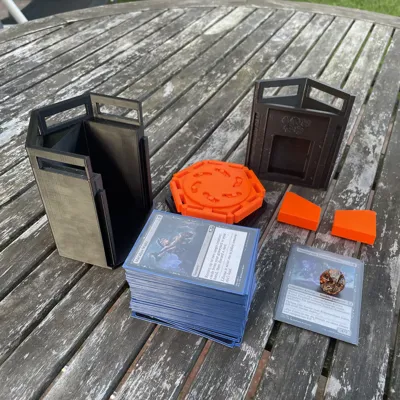
MTG Commander Deck Box v2


Print Profile(3)


Description
Update
There is a bigger version of this box with adjusted tolerances now! (As many comments suggested)
You will get the more spacious version if you print every stl with a "+".
I'd recommend printing the + version if you intend to double sleeve your deck or use thick sleeves. In case you are insure which to print you can just measure the thickness of your deck and compare it with these values:
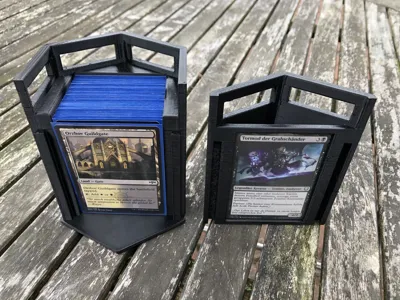
MTG Commander Deck Box v2 storage depth: 54mm
MTG Commander Deck Box v2+ storage depth: 75mm
Assembly
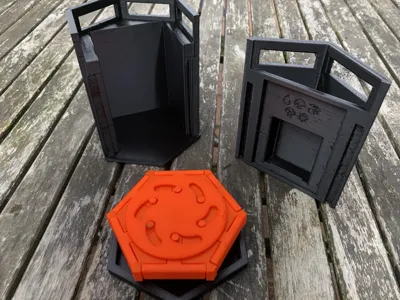
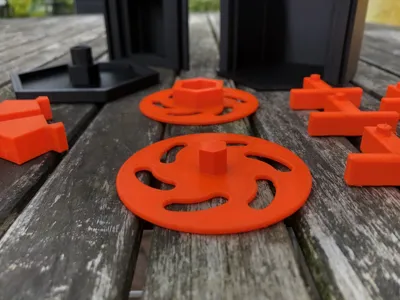
The parts will be referred to as follows:

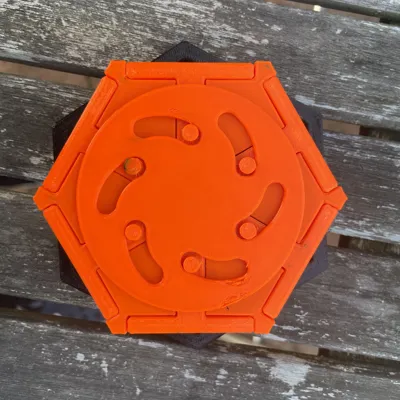
Lid assembly instructions
Lay the “lid surface” flat on a table and slide the “lid top plate” onto it. The flat side of the plate must face upwards.

Next, put the “lid locking plate” on top. If the fit is too tight and you can't rotate it easily, use a file to widen the hole of the locking plate.

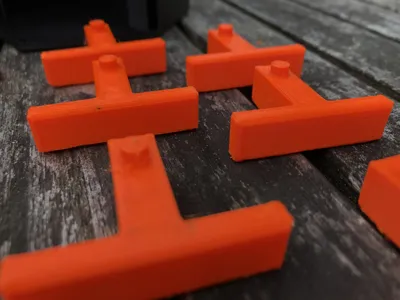
Not its time to put the six “lid locking bolts" in place. They are symmetrical, direction does not matter.

The “lid bottom plate” is the last part. It holds the lid assembly together. Put it on and test the mechanism. When you are happy with the locking/unlocking mechanism use a little superglue to combine the “surface” with the “bottom plate”.

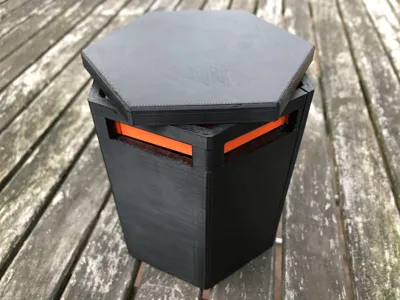
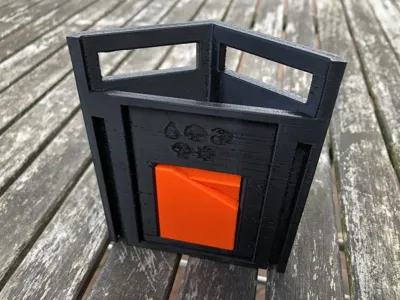
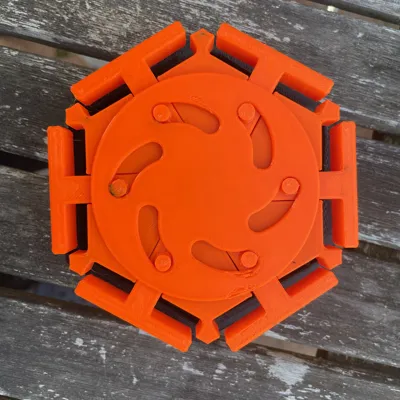
Your final result should look like this.
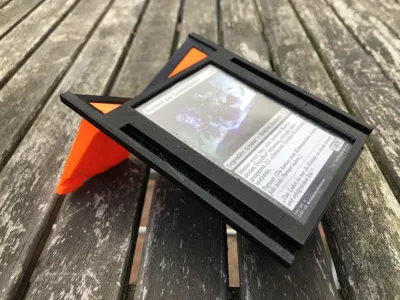
Door stands (optional)
In the upper compartment there is space for your dice and tokens. The rectangular hole is for the stands, folded together. You can remove the stands from the hole and attach them to the upper holes, so that it stands properly. The commander can now be inserted from the bottom of the part.


Print instructions
All stl files are saved in the direction I've printed them. The "body", "body door", “lid locking-bolt” should be printed with supports. Be careful when removing the supports in the upper parts of the door to not damage the pillars.
I used black and orange Prusament PETG with a layer height of 0.2mm. Other filament types should work as well.
Color combinations
I've designed this this box to be printed in two colors. But nothing is stopping you from making a monochrome or full rainbow version :)
I'm looking forward to see your prints.
Comment & Rating (68)